
You notice dark spots creeping along the drywall behind your washing machine on a Saturday morning. They weren’t there last month. Your basement flooded after that big storm in Palatine, and now something looks seriously wrong. That moment of recognition, where you realize mold may already be spreading inside your home, is one of the most stressful things a homeowner can face. This guide walks you through everything you need to know: identifying the problem, gearing up safely, cleaning it right, and knowing when to call for backup before a small patch turns into a five-figure restoration bill.
Table of Contents
- Understanding mold risks and when to act
- Essential safety gear and materials for mold cleanup
- Step-by-step mold remediation process for homeowners
- Troubleshooting and common mistakes in mold cleanup
- The real reason most DIY mold remediation fails
- Get help with mold and water damage restoration
- Frequently asked questions
Key Takeaways
| Point | Details |
|---|---|
| Act fast on mold | Begin cleanup within 48 hours of water damage to stop mold from spreading. |
| Know when to DIY | Homeowners can clean hard surfaces under 10 sq ft, but large or HVAC-affected areas need pros. |
| Safety first | Always use proper protective equipment and dispose of contaminated items. |
| Address moisture root | Fix leaks or water sources before starting mold cleanup for lasting results. |
| Professional help matters | Unresolved issues or recurring mold require certified remediation experts. |
Understanding mold risks and when to act
Mold is not a cosmetic problem you can ignore until spring cleaning. It is a living organism that feeds on moisture and organic material, and it spreads faster than most homeowners expect. In the Chicago area, the combination of humid summers, harsh winters, and frequent freeze-thaw cycles creates the ideal conditions for moisture to work its way into basements, crawl spaces, and wall cavities. A slow pipe leak behind drywall, a roof damaged by ice dams, or a basement that took on water during a spring storm, any of these events can trigger mold growth within 24 to 48 hours if the material stays wet.
Why this matters for your health and your home’s value:
The health and property risks of unchecked mold are well documented. Mold exposure can cause respiratory issues, allergic reactions, headaches, and aggravated asthma symptoms, especially in children and elderly residents. Beyond health, mold actively destroys the structural materials it colonizes. Wood framing, drywall, insulation, and subflooring can all break down under sustained mold growth, turning a manageable cleanup into a full gut-and-rebuild.
Common signs that mold or excessive moisture is present in your home include:
- Visible dark or discolored spots on walls, ceilings, or floors
- A persistent musty odor that doesn’t clear with ventilation
- Peeling or bubbling paint and wallpaper
- Warped or soft flooring, especially near plumbing fixtures
- Condensation on windows and cold surfaces during winter
- Water stains or rust marks on concrete or drywall
Understanding the types of mold after flooding common in the Chicagoland area can help you assess the severity of what you’re dealing with before you take any action.
The EPA draws a clear line on when homeowners can safely clean mold themselves and when to call a professional. According to EPA guidance on DIY vs. professional thresholds, mold covering an area smaller than 10 square feet on non-porous surfaces like tile or sealed concrete can typically be addressed by a careful homeowner. But if the affected area is larger, if mold has gotten into the HVAC system, if there has been sewage involvement, or if anyone in the household has respiratory conditions, you need professional mold remediation right away.
Pro Tip: Don’t wait to see how big the problem gets. Address any visible leak or moisture source the same day you spot it. Every 24 hours you wait doubles the surface area mold can colonize.
Essential safety gear and materials for mold cleanup
Before you touch anything, get protected. Disturbing mold releases spores into the air, and breathing those in or getting them on your skin can make a minor cleanup into a health event. The containment and PPE requirements vary based on the size of the affected area and the conditions present, but for any DIY cleanup, the following gear is non-negotiable.
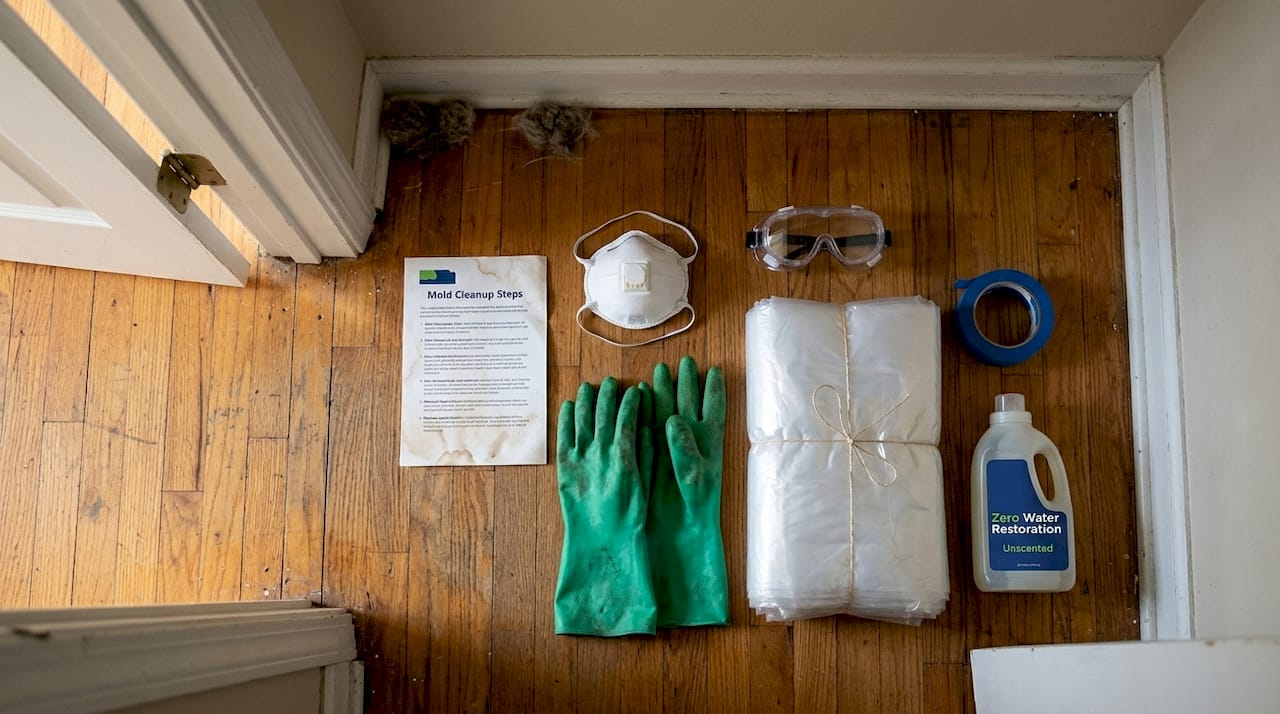
Safety equipment checklist:
- N95 respirator mask (not just a dust mask)
- Safety goggles without ventilation holes
- Nitrile or rubber gloves, long enough to cover wrists
- Disposable coveralls or old clothes you can bag and discard
- Rubber boots for flooded areas
Cleaning materials and tools:
- Mild detergent (dish soap or phosphate-free cleaner)
- Clean water supply and spray bottles
- Stiff-bristle brush for scrubbing non-porous surfaces
- HEPA vacuum for dry spore removal before wet cleaning
- Heavy-duty plastic sheeting and painter’s tape for containment
- Dehumidifier and box fans for drying
- Wet/dry shop vacuum for standing water
Here’s a quick reference table for what you need based on the area size:
| Area size | PPE level | Containment needed | Professional required |
|---|---|---|---|
| Under 10 sq ft | N95, gloves, goggles | Optional | No |
| 10 to 30 sq ft | Full PPE, coveralls | Recommended | Situational |
| Over 30 sq ft | Full PPE, coveralls | Required | Yes |
| HVAC involvement | Full PPE | Required | Always |
| Sewage contamination | Full PPE | Required | Always |
Also check your water damage prevention tips before starting cleanup, especially if the moisture source has not yet been fully identified.
Pro Tip: Never reuse contaminated rags, sponges, or brushes. Once they touch mold, seal them in a plastic bag and throw them away immediately. Reusing cleanup materials just spreads spores to new surfaces.
With your gear and materials ready, you can now proceed with the five-step remediation process outlined below.
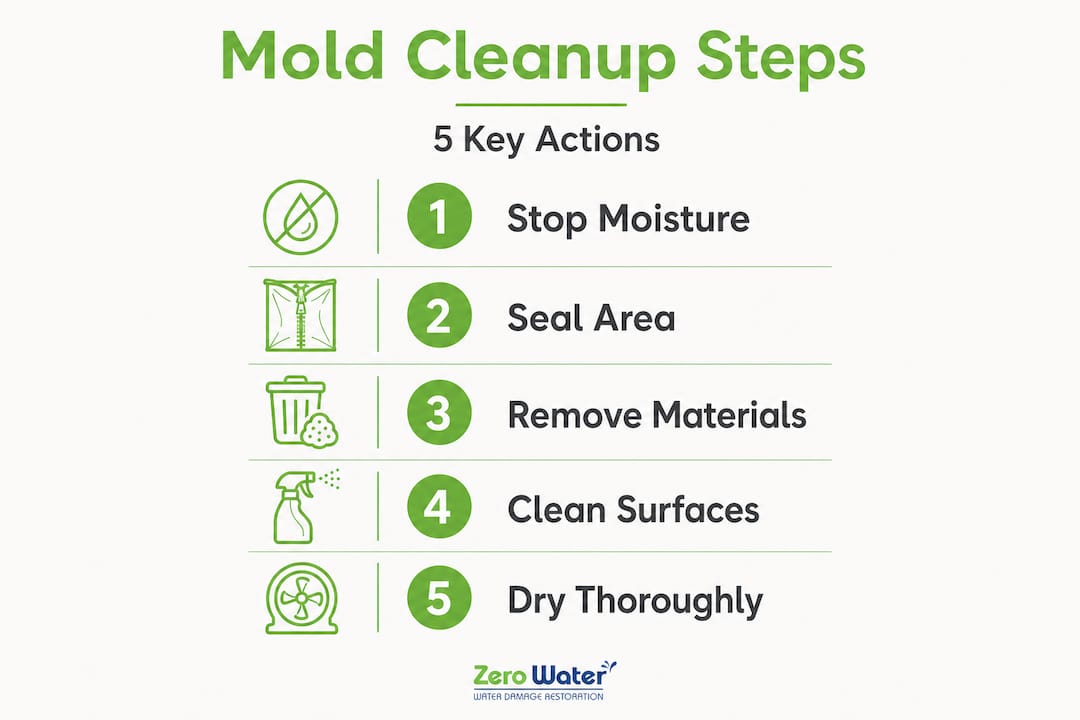
Step-by-step mold remediation process for homeowners
The standard remediation steps involve identifying and fixing the moisture source, containing the area, removing contaminated materials, cleaning surfaces, drying everything thoroughly, and verifying the results. Follow this sequence carefully. Skipping steps is the fastest way to ensure mold returns.
-
Stop the moisture source first. This is the single most important step. If you clean mold without fixing the leak, pipe, or drainage issue causing it, you are wasting your time. Locate the source, whether it’s a slow pipe drip, a failed window seal, or a condensation problem, and correct it before doing anything else. For temporary water damage repairs while you wait for a plumber or contractor, use waterproof tape and plastic sheeting to minimize ongoing moisture entry.
-
Contain the affected area. For anything beyond a very small spot, seal off the workspace. Tape heavy plastic sheeting over doorways and HVAC vents in the affected room. This keeps spores from traveling into adjacent rooms during cleanup. Turn off your HVAC system while working so you aren’t circulating contaminated air through the entire house.
-
Remove contaminated porous materials. Drywall, insulation, carpet, and ceiling tiles that have absorbed mold cannot be cleaned. They must come out. Cut away visibly affected drywall at least 12 inches beyond the last visible spot of mold growth, because mold roots (called hyphae) penetrate deeper than the surface. Bag all removed materials in heavy-duty plastic garbage bags and seal them tightly before carrying them through your home.
-
Clean all non-porous surfaces thoroughly. Hard surfaces like concrete, tile, and metal can be scrubbed with a detergent solution. You don’t need special mold-killing sprays for most situations. Plain dish soap and water, applied with a stiff brush, breaks down the mold’s surface structure effectively. Rinse with clean water and wipe dry. Avoid using bleach on porous surfaces, as it does not penetrate deep enough to kill mold roots and can damage materials.
-
Dry everything completely within 48 hours. Drying should occur within 48 hours to stop mold regrowth. Run dehumidifiers continuously and point fans at wet surfaces. In Chicagoland winters, running the furnace also helps lower indoor humidity. Use a moisture meter (available at any hardware store for under $30) to confirm that walls and floors have reached safe moisture levels, typically below 16% for wood and drywall.
“Mold growth can begin on wet materials within 24 to 48 hours. The faster you dry, the better your outcome.”
DIY vs. professional remediation: when to switch
| Situation | DIY appropriate | Call a pro |
|---|---|---|
| Small surface mold on tile | Yes | No |
| Mold on drywall or wood framing | Limited | Yes if >10 sq ft |
| Mold after basement flooding | No | Yes |
| Mold with health symptoms present | No | Yes |
| Mold near HVAC or air handler | No | Always |
| Mold following sewage backup | No | Always |
If you’re unsure whether your situation qualifies for DIY handling, review the guidance on choosing a restoration firm to understand what a qualified professional brings to the table before you make your decision.
Troubleshooting and common mistakes in mold cleanup
Even homeowners who follow every step can run into problems. Here are the most common reasons DIY mold remediation fails and what to do instead.
Mistakes that lead to recurring mold:
- Using bleach on wood, drywall, or other porous materials. Bleach’s active ingredient doesn’t penetrate below the surface, so it kills what you can see but leaves the root structure intact. According to EPA cleanup recommendations, proper cleaning with detergent and water is the right approach for most surfaces.
- Skipping PPE because the area looks small. Even a 6-inch patch of mold releases millions of spores when disturbed. Breathing those in during a 20-minute cleanup is enough to trigger a reaction.
- Underestimating how far mold has spread. What looks like a 2-square-foot spot on the surface often extends 2 to 3 times further behind the wall.
- Not running a dehumidifier after cleaning. Humidity alone can restart mold growth without any visible water source.
- Neglecting the HVAC system. If mold spores were airborne during a moisture event, your duct system may be carrying them throughout the house.
Pro Tip: If you clean an area and the odor returns within a week or two, stop and call a professional. A musty smell after cleanup is one of the clearest signs that mold is still active somewhere you haven’t reached.
Proper verification includes confirming that no odors or visible mold remain after the area is dry. If you’re not confident in your results, the restoration tips for Palatine homeowners are a useful resource that applies broadly across the northwest suburbs.
One more area homeowners frequently overlook: insurance. If mold resulted from a sudden water event like a burst pipe or storm flooding, your homeowner’s insurance may cover some or all of the remediation costs. Reviewing insurance claims guidance before you start cleanup, or before you hire anyone, can save you thousands of dollars in out-of-pocket expenses.
The real reason most DIY mold remediation fails
After more than a decade of responding to mold calls across the northwest suburbs, here’s the honest truth: most DIY mold jobs fail not because homeowners don’t work hard, but because they solve the wrong problem.
They scrub the visible mold. They bag the drywall. They run a fan for two days. Then six weeks later, the spots are back and they’re calling us anyway. The job they did the first time didn’t fail because of effort. It failed because the moisture source was never fully identified or corrected.
We have walked into homes in Schaumburg and Rolling Meadows where the homeowner had cleaned the same wall three times. Each time, the mold came back faster. The real culprit was a slow, nearly invisible condensation drip inside the wall cavity, caused by a missing vapor barrier and confirmed only with a thermal imaging camera. No amount of scrubbing was going to fix that.
The second most common failure point is containment. When you disturb mold without sealing off the area, you don’t reduce the problem. You spread it. Spores travel through HVAC vents, float under doors, and settle in adjacent rooms within minutes. Homeowners who clean a moldy basement corner without containment often end up with mold showing up in unexpected places weeks later.
The fix is not complicated. It requires following every step in order, starting with the moisture source, not the mold itself. Cleaning without addressing the source is just delaying a bigger bill. When you’re evaluating whether to handle it yourself or bring in a certified specialist, ask yourself honestly whether you know exactly where the moisture is coming from. If the answer is uncertain, choosing the right remediation expert early saves real money compared to fixing a recurring problem months down the road.
Get help with mold and water damage restoration
When mold has gone beyond a small surface area or keeps returning after cleanup, professional help is the most cost-effective move you can make. Certified remediation teams bring moisture detection equipment, containment systems, and commercial-grade drying tools that simply aren’t available at a hardware store.
Zero Water Restoration has been helping homeowners across Schaumburg, Arlington Heights, Palatine, and surrounding communities recover from mold and water damage for over 10 years. Our local mold remediation experts respond 24/7, assess the full scope of the problem, and work directly with your insurance provider so you’re not buried in paperwork on top of everything else. Whether you’re dealing with a slow leak that got out of hand or the aftermath of a basement flood, we handle the job from first inspection to final verification. If you’re in the Barrington area, our Barrington water damage specialists are ready to help. Call (847) 515-7000 or visit zerowaterrestoration.com for a free inspection and estimate.
Frequently asked questions
How quickly should I start mold cleanup after water damage?
Start cleanup as soon as possible and aim to have all materials dried within 48 hours, since mold begins growing on wet surfaces in as little as 24 hours after a water event.
What if mold keeps returning after I clean it?
Recurring mold almost always signals an unresolved moisture source, and addressing that source is the first and most critical step in any remediation effort.
Is bleach effective for mold removal?
Bleach works on hard, non-porous surfaces but is not effective on porous materials because it cannot penetrate deep enough. The EPA’s cleaning recommendations favor detergent and water for most residential mold cleanup situations.
Can I clean mold from HVAC ducts myself?
No. Mold inside HVAC systems requires certified professional remediation because DIY cleaning typically spreads spores throughout the entire duct network, and professional handling is required any time HVAC systems are involved.