
A water damage containment strategy is the process of physically isolating and atmospherically controlling affected areas to stop moisture, contaminants, and humid air from spreading beyond the initial damage zone. Most homeowners focus on stopping the source of water first, which is correct. But what happens in the next 30 minutes determines whether you’re dealing with a contained repair or a whole-home restoration. The right containment approach protects your structure, your air quality, and your insurance claim. This guide covers the methods, materials, standards, and steps you need to act fast and act right.
What is a water damage containment strategy and why does it matter?
A water damage containment strategy is defined by two simultaneous goals: stopping water from moving further into your structure and preventing moisture-laden air from contaminating unaffected spaces. The industry term professionals use is “structural drying containment,” and it goes well beyond laying down towels or running a box fan.
Failure to contain contaminated water events, specifically Category 3 sewage losses, leads to a 25% higher rate of health-related legal disputes and a 25% increase in project costs. That single statistic tells you everything about the stakes. Containment is not a cleanup step. It is a risk management decision.
The mold window is 24–48 hours. Once moisture sits in wall cavities, subfloors, or insulation beyond that window, mold colonization begins. Containment slows that clock by keeping humid air trapped inside a controlled zone where dehumidifiers and air movers can work efficiently. Without it, you are drying your entire house instead of the affected room.
For property managers overseeing multi-unit buildings, the risk multiplies. One burst pipe on the third floor can migrate moisture through ceiling assemblies to two floors below. A secondary water damage event in an unaffected unit is entirely preventable with proper containment barriers installed within the first hour.
What are the main methods and materials used for water damage containment?
Professional water damage control methods rely on two categories of tools: physical barriers and atmospheric controls. Both are required. Neither works well without the other.
Physical barriers
- Plastic sheeting (6-mil polyethylene): Taped floor to ceiling across doorways and openings to create a sealed zone. Zip Wall systems use spring-loaded poles to hold sheeting taut without damaging walls.
- Door flaps and zipper access panels: Allow workers to enter and exit the containment zone without breaking the seal. Critical for multi-day drying projects.
- Tape: Contractor-grade poly tape bonds sheeting to baseboards, door frames, and ceiling edges. Standard painter’s tape fails within hours in humid conditions.
Atmospheric controls
Sealing HVAC registers is non-negotiable during any containment setup. An open register turns your ductwork into a moisture distribution system, spreading humid air to every room connected to that zone. Cover every supply and return vent inside the containment area with poly sheeting and tape before any drying equipment runs.
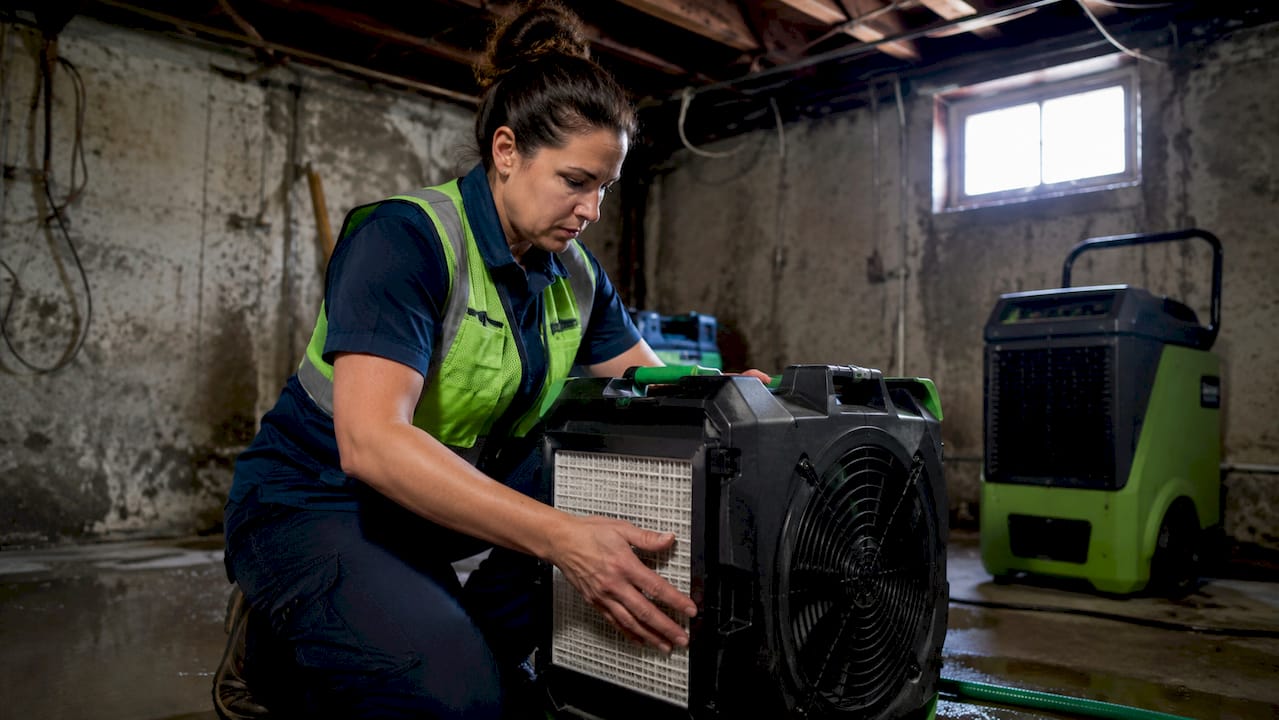
Inside the sealed zone, professionals deploy high-capacity dehumidifiers and air movers in a calculated pattern. The air movers direct airflow across wet surfaces to accelerate evaporation. The dehumidifier captures that evaporated moisture before it can re-absorb into building materials.
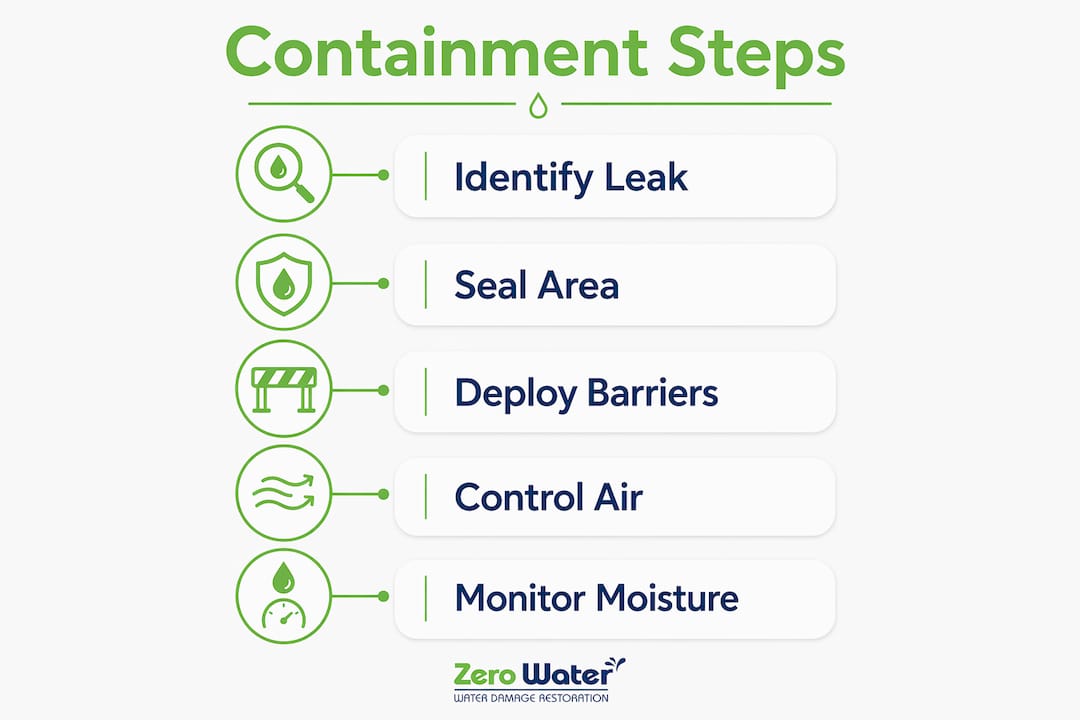
For Category 3 water events, which include sewage backups and floodwater, negative air pressure with HEPA filtration exhausted outside the building is required. This setup pulls air out of the containment zone rather than circulating it, preventing aerosolized sewage particulates from reaching clean areas of the home.
Pro Tip: Running fans without containment and dehumidification is one of the most common homeowner mistakes. Fans without proper containment circulate moisture-laden air into clean areas, causing secondary damage in rooms that were never touched by water. If you do not have a sealed zone and a dehumidifier running simultaneously, fans are making the problem worse.
How does proper containment reduce restoration time and costs?
Speed and containment work together. Proper containment and professional extraction within the first 12 hours can reduce total drying time by up to 50% compared to passive drying methods and save up to 40% on material replacement costs. That is not a marginal improvement. It is the difference between replacing drywall and replacing drywall, framing, insulation, and flooring.
The IICRC S500 Fifth Edition (2026) sets the scientific benchmarks for drying. Wood framing must reach below 16% moisture content. Drywall must come within 4 points of its equilibrium moisture content. These are not suggestions. Documenting these drying targets is directly tied to insurance outcomes, with failure to provide verified documentation leading to an 18% reduction in approved claim amounts.
| Containment action | Impact on restoration |
|---|---|
| Barriers installed within 1 hour | Limits moisture migration to initial zone |
| HVAC vents sealed immediately | Prevents spread to unaffected rooms |
| Dehumidifiers running inside zone | Reduces drying time by up to 50% |
| Drying targets documented (IICRC S500) | Supports 18% higher insurance claim approvals |
| Containment held until verified dry | Prevents mold regrowth in hidden materials |
A drying plan based on psychrometric data tracks temperature, humidity, and dew point trends to adjust equipment placement and airflow daily. Containment makes this possible. Without a sealed zone, environmental readings are meaningless because outside air constantly dilutes the controlled atmosphere inside the drying area.
For insurance purposes, every step matters. Adjusters look for documented containment setup, moisture readings at intake, and daily drying logs. A restoration company that photographs containment barriers, records equipment placement, and logs moisture content readings gives your claim a measurable advantage.
What are the challenges and common misconceptions about containment?
Most homeowners assume containment means putting up plastic sheeting and calling it done. The reality is that containment is a multi-layered strategy involving physical isolation, atmospheric management, and airflow control. Missing any one layer undermines the others.
Here are the most common mistakes and misconceptions:
- Removing containment too early: Surface dryness is not the same as structural dryness. Premature removal of containment based on visual inspection, rather than verified moisture readings, leads to mold regrowth in framing and subfloors within days. Barriers stay up until a moisture meter confirms drying targets are met.
- Skipping HVAC sealing: An open register inside the containment zone defeats the entire setup. Humid air travels through ductwork and deposits moisture in clean rooms. This is one of the most frequently missed steps in DIY containment attempts.
- Treating all water damage the same: Category 1 (clean water from a broken supply line) and Category 3 (sewage or floodwater) require completely different containment protocols. Category 3 events require negative air pressure and HEPA filtration. Category 1 does not. Applying the wrong protocol wastes time and money, or worse, creates a health hazard.
- Relying on household fans alone: Box fans move air. They do not remove moisture. Without a dehumidifier capturing evaporated water inside a sealed zone, fans simply redistribute humidity.
Pro Tip: Ask your restoration contractor to show you the moisture readings before they remove any containment barriers. A reputable company will have a daily drying log with timestamped readings. If they cannot produce one, that is a red flag.
How can homeowners and property managers implement containment promptly?
You will not have professional equipment on hand when a pipe bursts at 11 PM. What you do in the first 30–60 minutes still matters. Here is a practical sequence to follow before the restoration crew arrives.
- Shut off the main water valve immediately. Every minute of active flow adds to the total water volume and extends drying time. Tag your main valve location in advance so anyone in the household can find it fast. Standardizing valve tagging and keeping a flood response kit on site can keep water intrusion periods under 120 minutes.
- Relocate occupants if sewage is involved. Category 3 water events require occupants to leave the affected area immediately. Aerosolized contaminants pose direct health risks. Do not wait for the restoration crew to make this call.
- Cover HVAC registers in the affected room. Use plastic bags and tape if that is all you have. The goal is to stop humid air from entering the duct system before professional equipment arrives.
- Set up temporary barriers across doorways. Hang plastic sheeting, a tarp, or even heavy blankets across door openings to slow moisture migration into adjacent rooms. Tape the edges to the door frame as tightly as possible.
- Remove standing water with a wet-vac or sump pump. Do not use a standard vacuum. A wet-vac or submersible sump pump removes bulk water, which is the first step in reducing total moisture load. Every gallon removed shortens drying time.
- Document everything before you touch it. Take photos and video of the source, the affected area, and any visible damage. Capture the containment setup you put in place. This documentation supports your insurance claim and gives the restoration crew a baseline when they arrive.
Property managers should maintain a flood response kit in each building. The kit should include a wet-vac, rolls of 6-mil poly sheeting, contractor tape, sump pump with hose, and a printed sheet showing main valve locations for every unit. This preparation is the difference between a 20-minute response and a 2-hour one. For a detailed breakdown of the full commercial water damage cleanup process, the steps go well beyond initial containment and are worth reviewing before an event occurs.
Key Takeaways
A water damage containment strategy is the single most important factor in limiting restoration costs, preventing mold, and protecting your insurance claim outcome.
| Point | Details |
|---|---|
| Act within the first hour | Containment set up in the first hour limits moisture migration and cuts drying time by up to 50%. |
| Seal HVAC registers first | Open vents spread humid air through ductwork and undermine every other containment measure. |
| Category 3 requires negative air pressure | Sewage events need HEPA-filtered negative pressure systems to prevent whole-home contamination. |
| Never remove barriers by sight | Containment stays in place until moisture meters confirm IICRC S500 drying targets are met. |
| Document every step | Verified drying logs and containment photos support higher insurance claim approvals. |
Why containment is the decision that defines the whole restoration
I have seen hundreds of water damage jobs over the years, and the ones that go sideways almost always trace back to the same root cause: containment was treated as an afterthought. The homeowner ran fans, opened windows, and waited for things to dry out. Three weeks later, they called us about a mold smell they could not locate. The mold was in the wall cavity, exactly where the moisture had been sitting since day one.
Here is what most articles will not tell you. Containment is not just about keeping water in one place. It is about creating a controlled environment where your drying equipment can actually do its job. A drying plan built on psychrometric data only works when the environment it is measuring stays consistent. Every time you open a door into the containment zone without a zipper panel, you change the temperature and humidity readings. The drying plan has to reset. That adds days.
The other thing I push hard on is the HVAC seal. I cannot count how many times I have walked into a job where someone did a decent job with the poly barriers but left the register open. Within 24 hours, the adjacent bedroom had moisture readings above baseline. The containment looked right but was functionally useless.
My honest advice: treat containment as the foundation, not the frame. Get the zone sealed, get the HVAC covered, and get professional equipment running inside that zone as fast as possible. Everything else in the restoration process depends on that foundation being solid.
— Jim
How Zerowaterrestoration handles containment from the first call
When water damage hits your home or property, the containment setup that happens in the first few hours defines the entire restoration outcome.
Zerowaterrestoration responds 24/7 across the northwest suburbs of Chicago, including Schaumburg, Barrington, Arlington Heights, and Palatine. The team arrives with professional-grade poly barriers, zip wall systems, HEPA air scrubbers, and calibrated dehumidifiers. Every job includes documented moisture readings from day one, which protects your insurance claim and keeps the drying plan on track. For homeowners and property managers in the Barrington area, local water damage restoration is available with same-day response. Call (847) 515-7000 or visit zerowaterrestoration.com for a free inspection.
FAQ
What is a water damage containment strategy?
A water damage containment strategy is the process of physically isolating and atmospherically controlling a water-damaged area to stop moisture and contaminants from spreading. It includes plastic barriers, sealed HVAC registers, dehumidifiers, and in contaminated water events, negative air pressure with HEPA filtration.
How soon should containment be set up after water damage?
Containment should be established immediately after the water source is shut off, ideally within the first hour. Acting within 12 hours can reduce total drying time by up to 50% and significantly lower material replacement costs.
Can I set up water damage containment myself?
You can take immediate steps like sealing doorways with plastic sheeting, covering HVAC registers, and removing standing water with a wet-vac. Professional containment with calibrated drying equipment and moisture monitoring is required to meet IICRC S500 standards and protect your insurance claim.
When is it safe to remove containment barriers?
Containment barriers should only be removed after moisture content is scientifically verified to have reached drying targets. Wood framing must be below 16% moisture content per IICRC S500 (2026). Visual dryness is not a reliable indicator.
Does containment affect my insurance claim?
Yes. Documented containment setup and verified drying logs directly support claim approvals. Failure to document drying targets to IICRC S500 standards can result in an 18% reduction in approved insurance claim amounts.