
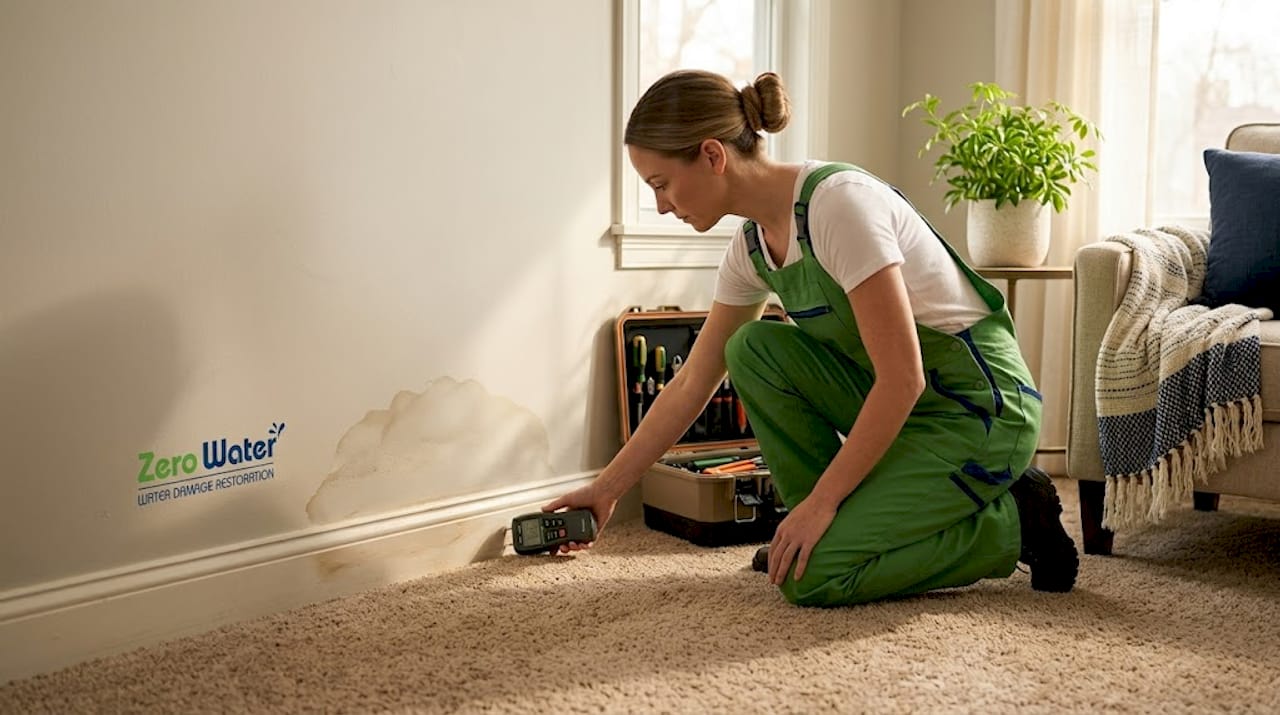
A pipe bursts at midnight. By morning, your floors are soaked, your drywall has absorbed a shocking amount of water, and you’re wondering: how long is this going to take? That question is completely understandable, and unfortunately, most answers you’ll find online give you a single number without telling you what actually drives that number. The truth is, restoration timelines vary enormously based on water type, materials, square footage, and how quickly you take action. This guide breaks all of it down so you can set realistic expectations and avoid the costly mistakes that stretch projects out for weeks longer than necessary.
Table of Contents
- What drives the restoration timeline?
- Step-by-step: What happens during restoration
- Insurance timelines and documentation steps
- Common timeline mistakes to avoid
- Our take: The truths most restoration timelines won’t tell you
- Fast-track your home recovery with Zero Water
- Frequently asked questions
Key Takeaways
| Point | Details |
|---|---|
| Many timeline factors | Water damage restoration duration depends on water type, materials, affected rooms, and how quickly mitigation starts. |
| Quick action is crucial | Fast reporting to pros and insurance can save weeks and prevent extra mold remediation. |
| Insurance impacts timeline | Approval delays and missed documents can stop repairs—plan for extra days and start early. |
| Complex spaces take longer | Kitchens, baths, and floors with concrete need more time than bedrooms or living rooms. |
| Trust measurements, not just looks | Professionals use moisture readings, not just a visual check, to know when your home is safely dry. |
What drives the restoration timeline?
Water damage is not a single event. It’s a chain reaction, and how fast you interrupt that chain determines everything about your timeline. Understanding what water damage categories and classes mean is the first step, because drying duration is determined by both water category (clean, gray, or black) and loss class (how deeply materials have absorbed moisture).
Water category tells you how contaminated the water is:
- Category 1 is clean water from a broken supply line or overflowing sink. Least health risk, fastest to remediate.
- Category 2 (gray water) comes from washing machines, dishwashers, or sump pump failures. Requires more caution and additional disinfection steps.
- Category 3 (black water) includes sewage backups and floodwater. It carries pathogens and demands full protective protocols, extensive removal, and longer remediation windows.
Water class describes how much material has absorbed the moisture:
- Class 1: Minimal absorption, such as a small section of carpet.
- Class 2: A whole room with wet walls and carpet.
- Class 3: Ceilings, walls, insulation, and subfloor are all saturated.
- Class 4: Dense materials like hardwood, concrete, or plaster are involved. These need specialized drying equipment and significantly more time.
Here’s a practical snapshot of typical timeline ranges based on category and class:
| Category/Class | Drying time | Full restoration estimate |
|---|---|---|
| Cat 1 / Class 1 | 2 to 3 days | 3 to 7 days |
| Cat 1 / Class 2 | 3 to 5 days | 1 to 3 weeks |
| Cat 2 / Class 2 | 4 to 6 days | 2 to 4 weeks |
| Cat 2 / Class 3 | 5 to 7 days | 3 to 5 weeks |
| Cat 3 / Any class | 7 to 10+ days | 4 to 8+ weeks |
Several factors beyond category and class also push these numbers up or down:
- Square footage affected: A flooded basement is a very different project from a leaking bathroom vanity.
- Materials involved: Porous materials like drywall and insulation absorb more water and are often removed rather than dried in place.
- Ventilation and ambient humidity: A humid Illinois summer actually slows the drying process if equipment isn’t calibrated to the conditions.
- How fast you act: Every hour of delayed response increases how deeply water penetrates dense materials and raises mold risk substantially.
Understanding how pros assess water damage reveals that moisture readings from calibrated meters, not visual inspections, are what actually confirm drying progress. Concrete slabs, for example, can look dry on the surface while remaining dangerously wet beneath.
Pro Tip: Never rely on the “feels dry” test. A surface can appear and feel dry while retaining enough moisture below to sustain mold growth for weeks. Certified technicians use penetrating moisture meters to verify true dryness before any repairs begin.
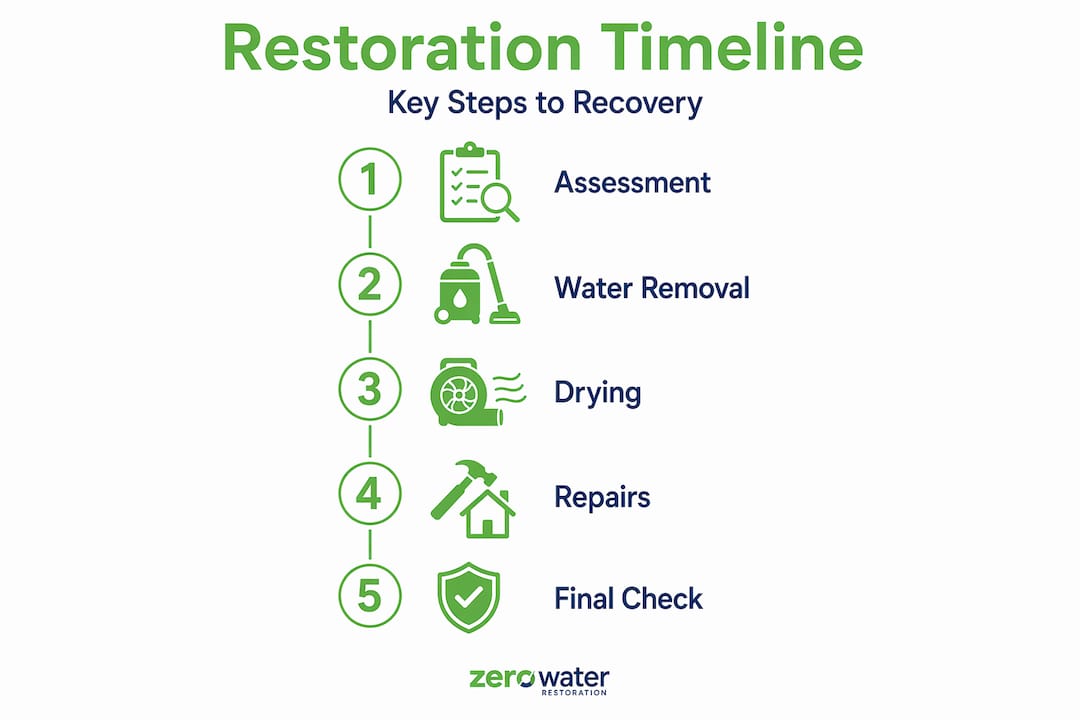
Step-by-step: What happens during restoration
With an understanding of what impacts timeline, here’s how the process usually unfolds step-by-step.
-
Assessment and inspection (Day 1, 1 to 4 hours). A certified technician arrives, maps the moisture with meters and thermal imaging, identifies water category and class, and creates a drying plan. This step sets the entire scope of the project.
-
Emergency mitigation (Day 1, same day to 48 hours). This includes water extraction with truck-mounted pumps, removing saturated materials that cannot be saved, and placing industrial air movers and dehumidifiers. The goal is to stop active damage as fast as possible.
-
Structural drying (Day 2 through Day 7 or longer). Equipment runs continuously. Technicians return every 24 to 48 hours to take new moisture readings and adjust equipment placement. You cannot rush this phase without risking hidden moisture problems later.
-
Demolition and removal of unsalvageable materials (Overlapping with drying or immediately after). Wet drywall, insulation, flooring, and cabinetry that won’t dry safely are torn out. This can surprise homeowners who thought everything would be saved.
-
Mold prevention treatment (End of drying phase). Antimicrobial treatments are applied to affected framing and surfaces. If mold has already developed, remediation is added to the scope, which adds both time and cost.
-
Reconstruction and finish work (Week 2 through project completion). New drywall, flooring, cabinetry, paint, and fixtures are installed. This phase’s duration depends almost entirely on scope, material availability, and permit requirements.
Here’s a direct comparison between two common loss types:
| Phase | Small bedroom (Class 1) | Kitchen/bathroom (Class 3) |
|---|---|---|
| Assessment | 1 to 2 hours | 2 to 4 hours |
| Emergency mitigation | 1 day | 1 to 2 days |
| Structural drying | 3 to 5 days | 5 to 10 days |
| Demolition/removal | Minimal or none | Significant, 1 to 3 days |
| Reconstruction | 3 to 5 days | 3 to 8 weeks |
| Total estimate | 1 to 2 weeks | 5 to 10+ weeks |
Warning: The risks of delaying repairs are compounding. If you delay professional drying, total project duration can increase substantially because mold can establish in as little as 24 to 48 hours, adding remediation scope, cost, and weeks to your project timeline.
Pro Tip: Starting mitigation the same day as the loss is the single most powerful thing you can do to shorten your overall project. Even partial mitigation, like extracting standing water before the full crew arrives, makes a real difference in how deeply moisture penetrates materials.
Insurance timelines and documentation steps
After understanding the restoration phases, coordinating insurance is your next critical priority.
Most homeowners don’t realize that insurance claims step-by-step management runs parallel to, not after, the restoration work. Slow or incomplete documentation is one of the top reasons projects stall. Insurance and claims assistance commonly intersects the restoration timeline, meaning approvals and documentation gaps directly delay when repairs can start.
Here’s what to do and when:
-
Document before anything is moved. Take photos and video of every affected room from multiple angles before extraction begins. Capture damaged contents, walls, flooring, and ceilings.
-
Call your insurance company the same day. Most policies include a “duty to mitigate,” which means you’re required to take reasonable steps to prevent further damage. Waiting to call can actually give your insurer grounds to dispute coverage.
-
Request a claim number immediately. You’ll need this number before any restoration contractor can work directly with your adjuster.
-
Share all moisture mapping and moisture reading data with the adjuster. Professional restoration companies like Zero Water Restoration document every reading, which supports your claim and speeds approvals.
-
Keep a written log of every conversation. Date, time, rep name, and what was said. This protects you if anything is disputed later.
The ways insurance delays ripple into your restoration timeline include:
- Approval lag: If the adjuster hasn’t approved demolition, work stops. Some approvals take 3 to 10 business days.
- Supplemental requests: When additional damage is found mid-project, a change order must be submitted and approved before work continues.
- Documentation gaps: Missing photos, no moisture readings, or vague line items on the scope of work lead to disputes that can add weeks.
- Adjuster scheduling conflicts: Especially after major storms, adjusters are overwhelmed, and your inspection date gets pushed back.
Acting as your own restoration partner for insurers is exhausting when you’re already dealing with a damaged home. Having a restoration company that works directly with adjusters on your behalf makes an enormous practical difference.
Common timeline mistakes to avoid
Even with the best plan, some mistakes can stretch your timeline significantly. Here’s how to avoid the most common ones.
Top timeline-extending mistakes:
- Delaying professional mitigation. Waiting even one extra day can mean the difference between saving your hardwood floors and tearing them out entirely.
- Assuming “air drying” is sufficient. Opening windows and running a box fan does not achieve the controlled drying environment that industrial equipment provides. Relative humidity in the drying zone matters just as much as air movement.
- Skipping or skimping on documentation for insurance. If you don’t photograph damage before extraction, you may not be able to prove the full extent of your loss to your adjuster.
- Accepting a generic “a few weeks” estimate. Every project needs a scope-based schedule with phases, milestones, and material lead times identified upfront.
- Ignoring materials beneath the surface. Wet subfloor under tile, or moisture trapped behind backerboard in a bathroom, will cause mold and structural problems if missed.
Kitchen and bath losses typically take longer than any other room in the house. Built-in cabinetry, tile, waterproofing membranes, and plumbing all have to be addressed before reconstruction can begin. Plan for a minimum of 4 to 8 weeks in these spaces, even when drying goes smoothly.
Concrete deserves special attention. Dense materials like concrete require longer controlled drying than drywall or carpet, sometimes several weeks with specialized desiccant equipment. Rushing this step causes moisture to reappear later, often triggering mold growth in finished spaces above the slab.
Don’t trust the surface. What looks and feels dry absolutely is not always dry. Certified technicians rely on data from penetrating meters, not appearances. Skipping verification before closing up walls is one of the most expensive mistakes in restoration work.
Pro Tip: When getting estimates, ask every contractor to provide a scope-based schedule, not just a dollar figure and a rough completion window. A good scope lists each phase, the materials to be removed or replaced, the target moisture levels, and estimated lead times for materials. If a contractor can’t produce that, keep looking.
Knowing how to make temporary repairs before the full crew arrives can also reduce additional damage, especially with roof leaks or broken windows that allow weather exposure.
Our take: The truths most restoration timelines won’t tell you
Here’s something we see constantly after a decade in this business: the number that causes the most frustration isn’t the drying time. It’s the gap between when drying finishes and when the home actually looks and functions normally again.
Most contractors quote drying timelines because that’s the part they can control. What they underquote, or leave vague, is the labor and material lead time for reconstruction, especially in kitchens, bathrooms, and finished basements. Tile has to be matched or ordered. Cabinets are often custom. Permits for structural work in the northwest suburbs take time to process. None of that has anything to do with how skilled your restoration team is. It just takes time.
We’ve also seen homeowners push for reconstruction to start before drying is verified complete. It feels like progress. It isn’t. Enclosing moisture inside finished walls creates mold problems that cost more to fix than the original water damage. Trust the meter readings, not the calendar pressure.
The other thing most timelines gloss over is how documentation quality affects project duration. Claims that are well-documented with moisture maps, photo logs, and detailed scopes move faster through insurer review. Claims that are vague or incomplete get questioned, revised, and delayed. We’ve seen a well-documented claim clear in under a week, and a poorly documented one drag on for over a month for the same type of loss.
Our honest recommendation: don’t just look for the fastest quote. Look for a restoration company that can show you a real scope, commit to moisture verification before closing walls, and communicate with your insurer directly. Check our blog for more detailed guidance on what to ask and when to call for help.
Fast-track your home recovery with Zero Water
When water damage hits your home in Schaumburg, Arlington Heights, Barrington, or anywhere in the northwest suburbs, timeline matters most in the first 24 hours. That’s when the right response prevents weeks of additional damage and cost.
Zero Water Restoration responds 24/7, handles everything from emergency water extraction through final reconstruction, and works directly with your insurance company so you don’t have to manage adjusters on your own. Whether you’re dealing with a burst pipe at 3 AM or storm flooding on a holiday weekend, our team is ready. If you’re dealing with mold concerns alongside your water damage, our mold remediation options are part of the same complete-service approach. Need insurance help for homeowners right now? We’ve got you covered. Reach our Barrington water damage experts and the full Chicagoland team at (847) 515-7000 or visit zerowaterrestoration.com for a free inspection and estimate.
Frequently asked questions
How long does it realistically take to restore water damage in a home?
Most projects take between a few days for drying and up to several weeks for full repairs, because two leaks can have very different timelines depending on water category, area size, materials involved, and how quickly mitigation began.
How does insurance affect my restoration schedule?
Insurance approvals and documentation requirements often add days or weeks to a project, and claims assistance commonly intersects the restoration timeline, so quick reporting and complete photo documentation are essential to keeping things moving.
Are there parts of the home that always take longer to restore?
Yes. Kitchen and bath losses typically take longer due to complex finishes, plumbing, and built-in systems, often requiring 4 to 8 weeks or more even when drying itself is completed quickly.
Why can concrete drying extend the total project?
Dense materials like concrete require longer controlled drying than standard drywall or carpet, sometimes adding weeks to the schedule if specialized desiccant equipment isn’t used from the start.
What’s the fastest way to shorten the restoration timeline?
Act the same day. Starting mitigation immediately and calling your insurer right away prevents deeper moisture penetration, because delaying professional drying can substantially increase total project duration through compounding mold risk and material saturation.