
Restoration project phases are the sequential steps required to return a water-damaged property to its pre-loss condition, covering everything from the first emergency call to the final contractor walkthrough. Understanding these stages of restoration projects gives you a clear picture of what to expect, who does what, and why skipping a step creates bigger problems down the road. The industry standard framework, shaped by guidelines like the IICRC S500 for structural drying, breaks the process into seven distinct phases, each with specific safety and documentation requirements. Knowing the sequence puts you in control instead of at the mercy of whoever shows up with a truck.
What are the main restoration project phases explained?
Professional water damage restoration follows seven sequential phases. Each phase has a defined purpose, and each one must be completed before the next begins.
1. Emergency response
The clock starts the moment water enters your property. A qualified restoration team arrives, secures the site, shuts off the water source if needed, and performs an initial safety check for electrical hazards and structural risks. This phase also covers board-ups, tarping, and any temporary measures to stop active damage from spreading. Speed here directly limits the total scope of repairs.
2. Damage assessment and documentation
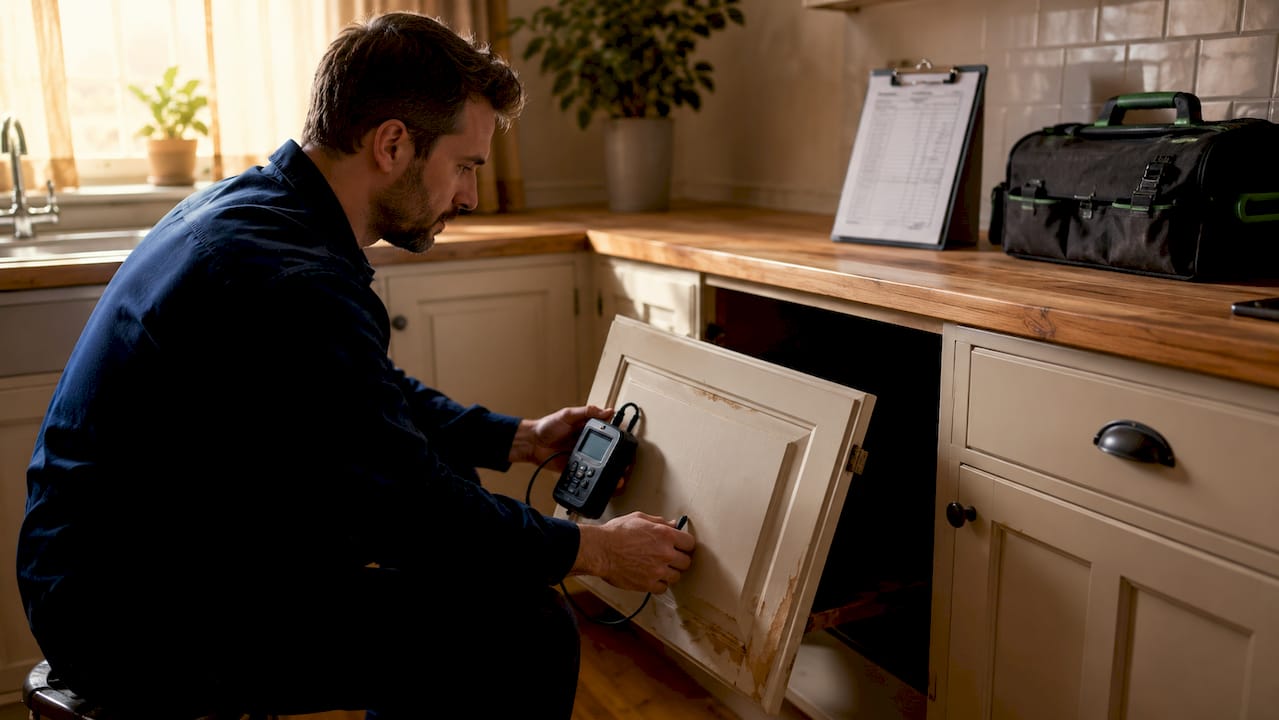
Every affected surface, material, and system gets photographed, measured, and logged. This documentation is not just paperwork. It becomes the foundation for your insurance claim, the contractor’s scope of work, and the final compliance record. Thorough photographic records protect your property’s long-term value and satisfy regulatory requirements. Skipping this step leaves you with no proof of what was damaged before work began.
3. Insurance coordination
Filing a claim and managing an adjuster inspection is the phase most homeowners find the most stressful. Adjusters handle high claim volumes and can miss hidden damage without expert guidance on site. Having your restoration contractor present during the adjuster’s inspection is the single most effective way to prevent claim underfunding. Your contractor knows what to look for behind walls, under floors, and inside cavities that an adjuster may not open.
Pro Tip: Never let the adjuster inspect alone. Your contractor’s presence during that first walkthrough can mean the difference between a fully funded repair and a shortfall you pay out of pocket.
Key tasks in this phase include:
- Filing the initial claim with your insurer and receiving a claim number
- Scheduling the adjuster inspection with your contractor present
- Reviewing the adjuster’s scope against the contractor’s documented damage assessment
- Negotiating any discrepancies before work begins
- Confirming coverage limits, deductibles, and any exclusions in writing
4. Mitigation and drying
Mitigation is the technical core of any water damage restoration project. This phase covers water extraction, structural drying, and daily moisture monitoring per IICRC S500 standards. Industrial dehumidifiers, air movers, and moisture meters run continuously until documented readings confirm the structure is dry. If fire or smoke damage is also present, this phase includes soot removal and odor neutralization using thermal fogging or hydroxyl generators.
Rushing reconstruction before drying is complete leads to mold growth and recurring structural damage. Always require written moisture documentation before signing off on any rebuild work.
Key tasks in this phase include:
- Standing water extraction using truck-mounted or portable units
- Placement of commercial-grade air movers and dehumidifiers
- Daily moisture readings logged by date, location, and reading
- Removal of unsalvageable materials such as wet drywall and saturated insulation
- Clearance documentation confirming the structure meets dry standard before reconstruction
Pro Tip: Ask your contractor for the daily moisture logs. If they cannot produce them, that is a red flag. Documented drying is your protection against mold claims later.
5. Reconstruction planning
Reconstruction planning runs best when it starts during mitigation, not after. Concurrent planning during the drying phase allows your contractor to pull permits, source materials, and schedule trades so work can begin the day drying is certified complete. When mitigation and reconstruction are handled by separate contractors, the handoff alone can add weeks to your timeline. A full-service provider eliminates that gap entirely.
Key advantages of concurrent planning include:
- Permits submitted while drying is still in progress
- Material selections finalized before reconstruction begins
- Subcontractors scheduled in advance rather than booked after the fact
- Insurance supplements filed if additional damage is uncovered during demolition
Pro Tip: Ask any contractor you interview whether they handle both mitigation and reconstruction. If they stop at drying and hand you off, budget extra time for the transition.
Homeowners who want a deeper look at renovation project management during complex restorations will find that the same scheduling principles apply whether the trigger is water damage or a planned remodel.
6. Rebuild and remodel
The rebuild phase is where your home starts to look like itself again. Framing, drywall, insulation, flooring, cabinetry, trim, and paint all happen in a defined sequence. Each trade follows the previous one, and a single contractor managing all of them prevents the scheduling conflicts that arise when you coordinate multiple subs yourself.
This phase also presents a practical opportunity. Since walls and floors are already open, many homeowners choose to upgrade finishes, reconfigure layouts, or address deferred maintenance items at the same time. The incremental cost of upgrading while the space is already torn apart is almost always lower than returning later for a separate project.
| Rebuild task | What it involves |
|---|---|
| Framing and structural repair | Replacing damaged studs, joists, or subfloor sections |
| Drywall and insulation | Installing new panels and vapor barriers to code |
| Flooring | Hardwood, tile, or LVP installation per selected finish |
| Cabinetry and millwork | Kitchen or bathroom cabinet reinstallation or replacement |
| Paint and final finishes | Primer, paint, and touch-up to match or upgrade existing surfaces |
Pro Tip: If your flooring or cabinetry was already dated before the damage, this is the lowest-cost moment to upgrade. The labor to install new materials is already in the scope.
7. Final walkthrough and warranty
The final phase is a structured review of every item in the scope of work. You walk the property with your project manager, confirm each line item is complete, and document any punch list items that need correction. A reputable contractor provides a written warranty covering both materials and workmanship. This phase also closes out the insurance file, with the final invoice submitted to your insurer for payment reconciliation.
The restoration contractor’s role at this stage is to hand you back a property that meets or exceeds its pre-loss condition, with full documentation of every phase completed.
Key Takeaways
A water damage restoration project follows seven defined phases, and skipping or rushing any one of them creates compounding problems that cost more to fix later.
| Point | Details |
|---|---|
| Seven phases define the process | Emergency response through final walkthrough forms the complete restoration sequence. |
| Documentation protects you | Daily moisture logs and photographic records support your insurance claim and prevent future disputes. |
| Contractor presence matters at inspection | Having your contractor at the adjuster walkthrough prevents claim underfunding and missed damage. |
| Concurrent planning saves time | Starting reconstruction planning during mitigation compresses the overall project timeline significantly. |
| Full-service providers reduce risk | A single contractor managing mitigation and rebuild eliminates handoff delays and coordination gaps. |
What I have learned after watching hundreds of these projects play out
The homeowners who get through water damage restoration with the least stress share one trait. They treat the process as a managed project, not a crisis to survive. That shift in mindset changes every decision they make.
The phase that trips people up most consistently is insurance coordination. Property owners assume the adjuster is there to find all the damage. That is not how it works in practice. Adjusters are managing dozens of claims at once, and they work from what they can see. A contractor who knows where to look, and who can speak the adjuster’s language, changes the outcome of that inspection. I have seen claims go from partial coverage to full coverage simply because the right person was in the room.
The second mistake I see regularly is treating mitigation and reconstruction as two separate projects. Many restoration companies stop after mitigation, leaving you to find a rebuild contractor on your own. That handoff costs weeks. When you choose a provider who handles both phases, the transition is internal. Permits are already pulled. Materials are already ordered. The crew shows up the day drying is certified complete.
Document everything. Every phase, every reading, every conversation. Meticulous documentation is not just useful for the current repair. It becomes part of your property’s permanent record and protects you in any future sale or insurance dispute.
— Jim
Zerowaterrestoration handles every phase, start to finish
Water damage in the Chicagoland area moves fast, and so does Zerowaterrestoration. The team responds 24/7 to emergencies across Schaumburg, Arlington Heights, Barrington, Lake Zurich, Streamwood, and the surrounding northwest suburbs.
Zerowaterrestoration manages every phase of the restoration process under one roof, from emergency water extraction and structural drying through insurance coordination, reconstruction planning, and the final walkthrough. The team works directly with your insurer to document damage, communicate with adjusters, and keep your out-of-pocket costs as low as possible. Homeowners across the northwest suburbs trust Zerowaterrestoration because the job does not end at mitigation. For a free inspection and estimate, call (847) 515-7000 or visit zerowaterrestoration.com to get started.
FAQ
What are the phases of a water damage restoration project?
A standard water damage restoration project follows seven sequential phases: emergency response, damage assessment and documentation, insurance coordination, mitigation and drying, reconstruction planning, rebuild and remodel, and final walkthrough with warranty.
How long does the mitigation and drying phase take?
Drying timelines vary based on the extent of water intrusion and the materials affected, but the phase is complete only when moisture readings meet the documented dry standard per IICRC S500. Rushing this phase causes mold growth and structural damage.
Why should my contractor be present during the insurance adjuster inspection?
Adjusters manage high claim volumes and can miss hidden damage without expert guidance on site. Contractor presence during inspection ensures all affected areas are identified and documented before the scope is finalized.
Can reconstruction planning start before drying is finished?
Yes, and it should. Concurrent reconstruction planning during the drying phase allows permits to be pulled and materials sourced in advance, compressing the overall project timeline significantly.
What is the difference between mitigation and restoration?
Mitigation stops active damage and removes moisture from the structure. Restoration rebuilds what was damaged. Both phases are required for a complete project, and a full-service contractor handles both without a handoff gap.