
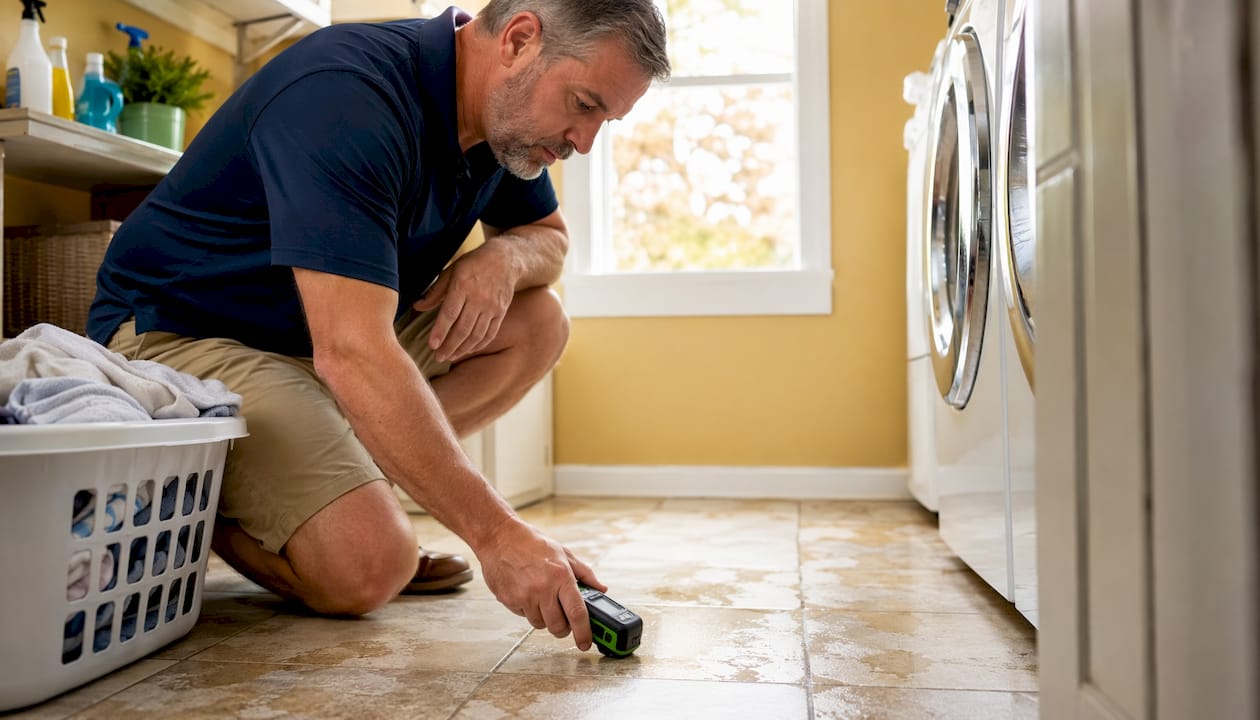
The most common examples of water damage subfloor problems are soft or spongy spots underfoot, delaminating OSB edges, hollow-sounding tiles, buckled LVP seams, and a persistent musty odor that returns after cleaning. If you’re standing on a floor that gives slightly when you step on it, or you’re noticing cracked grout lines that weren’t there six months ago, the subfloor is likely already compromised.
Act immediately:
- Stop the water source first. Shut off the supply valve or main if needed.
- Photograph and video every affected area with timestamps before touching anything.
- Remove standing water with towels, a wet/dry vacuum, or a mop.
- Open windows, run fans, and set up dehumidifiers if it’s safe to do so.
- Call a licensed restoration contractor if you see mold, smell sewage, or the floor feels structurally soft.
Industry standard testing from IICRC-certified contractors uses moisture meters to flag readings above 20% as significant, and readings above 25% often mean replacement should be considered rather than repair. Zerowaterrestoration provides 24/7 emergency response throughout the northwest Chicago suburbs for exactly these situations.
Table of Contents
- 1. What do water-damaged subfloors look like on different floor types?
- 2. What causes water to reach the subfloor in the first place?
- 3. How to inspect your subfloor yourself
- 4. Repair or replace? How to decide
- 5. What a restoration contractor actually does
- 6. Will insurance cover subfloor replacement?
- 7. How to keep your subfloor dry going forward
- 8. Red flags that mean you need a pro right now
- Key Takeaways
- What Chicagoland homes keep teaching us about subfloor damage
- Zerowaterrestoration: fast help when your subfloor can’t wait
- Useful sources and further reading
1. What do water-damaged subfloors look like on different floor types?
The physical signs vary by what’s on top, but the subfloor failure underneath follows the same pattern: absorbed moisture weakens the wood fibers, causes swelling, and eventually destroys structural rigidity.
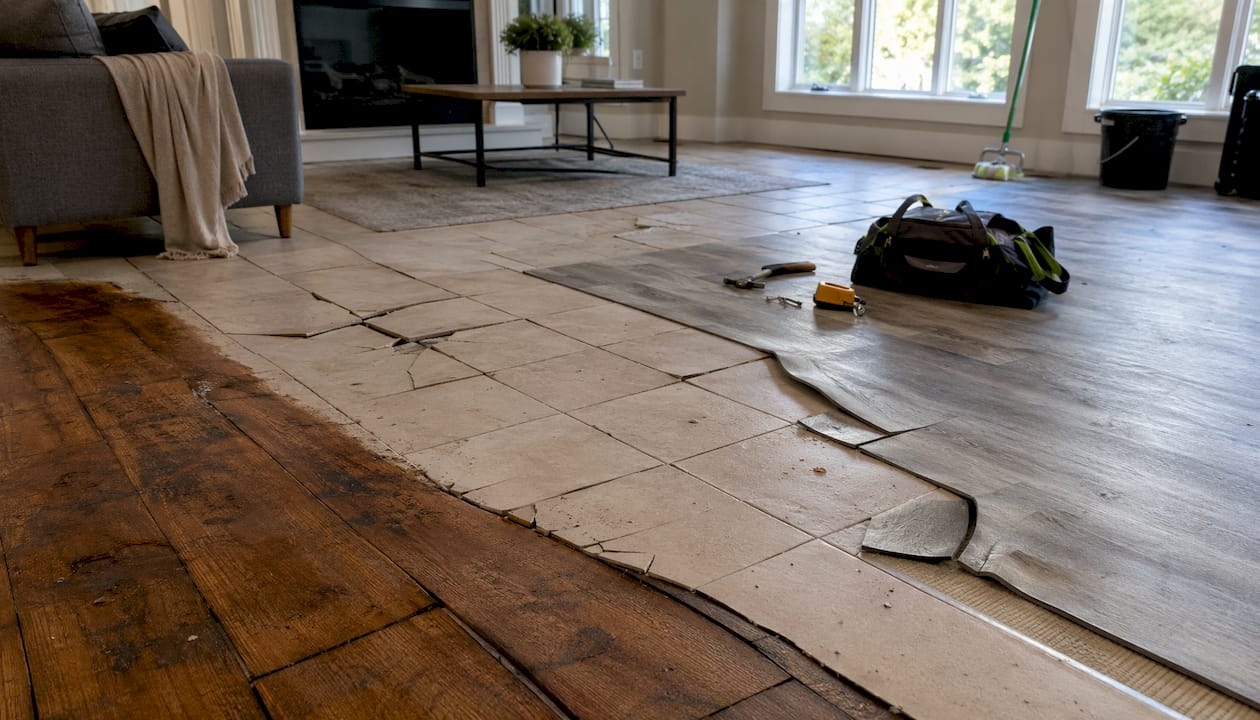
Hardwood floors cup along the edges first, with the board centers rising or the edges lifting. Dark staining at seams points to moisture that’s been sitting long enough to discolor the wood. Walk the room slowly and feel for springy or soft spots over joist bays — those are the most telling.
Tile floors tell a different story. Cracking grout, hollow-sounding tiles, and hairline fractures in the tile itself usually mean the subfloor has shifted or softened enough to break the mortar bond. A tile that sounds hollow when you tap it isn’t a surface problem. More on the tap test in Section 4.
LVP, laminate, and vinyl plank show edge lifting at transitions, bubbling in the field, or separation at seams. These materials don’t absorb water the way wood does, so they often look fine on top while the OSB underneath is already delaminating.
Carpet hides damage the longest. Persistent wet spots that return after drying, or a musty odor that won’t quit, are the main tells. By the time carpet smells consistently bad, the subfloor below has usually been wet for weeks.
Where to check first: toilets and wax rings, under sinks, behind dishwashers, laundry areas, exterior door thresholds, and any crawlspace access points.
Pro Tip: New squeaks that come with flex — meaning the floor bounces slightly as you walk — are a stronger warning sign than squeaks alone. Squeaks without flex are often just settling. Squeaks with give mean the subfloor is losing stiffness.
2. What causes water to reach the subfloor in the first place?
Most subfloor water damage doesn’t come from a dramatic flood. It comes from slow, hidden sources that go unnoticed for weeks or months.
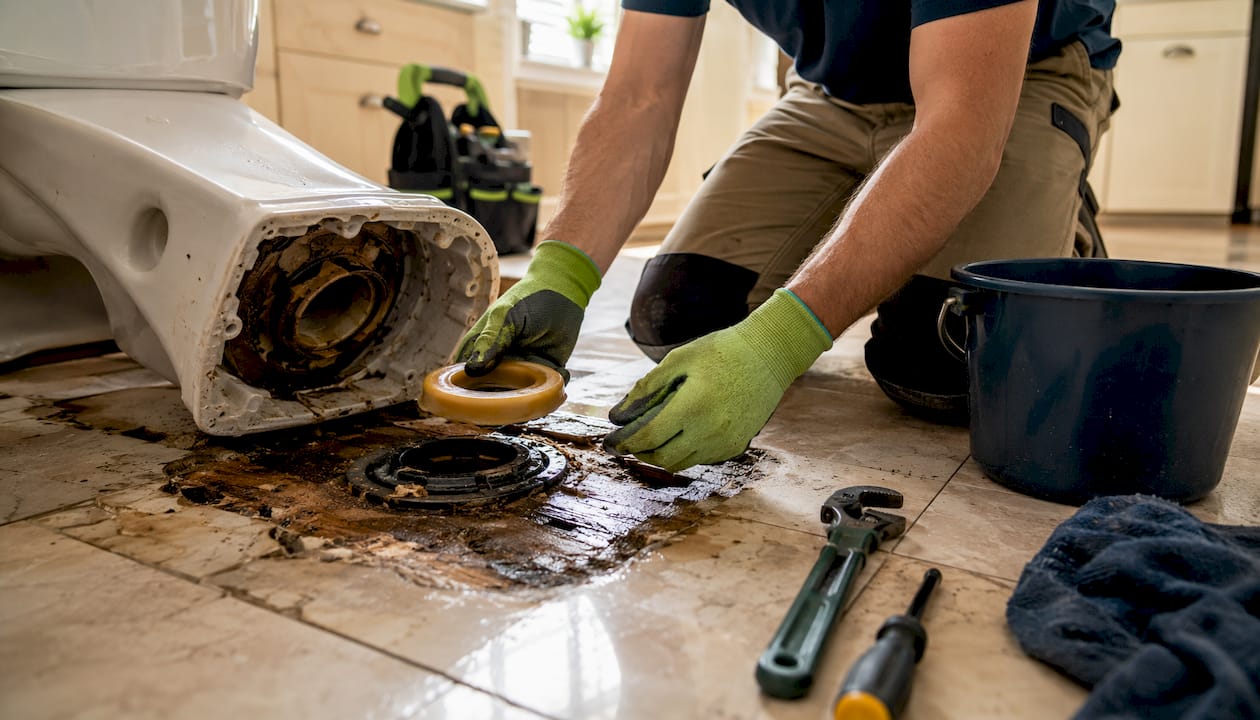
Slow plumbing leaks are the most common culprit. A failed wax ring under a toilet lets water seep into the subfloor with every flush. Pinhole leaks in supply lines drip steadily behind walls. A loose dishwasher connection drains a cup of water per cycle directly onto the subfloor below.
Appliance failures hit fast and hard. Washing machine hoses that crack, refrigerator ice-maker lines that disconnect, and dishwasher door seals that fail can dump significant water before anyone notices. Overflow pans without drain connections make this worse.
Storm and threshold entry is common in older Chicagoland homes. Surface water tracks under exterior doors when thresholds are worn or grades slope toward the house. Even a modest rain event can push water under a door and saturate the subfloor near the entry.
Crawlspace humidity is the slow killer. A crawlspace without a vapor barrier, or with poor ventilation, maintains high ambient humidity year-round. That moisture migrates upward into the subfloor continuously, causing gradual softening and mold growth that’s invisible from above.
Pro Tip: Before calling a contractor, check the wax ring around every toilet by pressing firmly on the floor immediately beside the base. Any give or sponginess there is almost certainly a wax ring failure, not settling.
3. How to inspect your subfloor yourself
A methodical inspection takes about 30 minutes and can tell you a lot before a contractor arrives.
- Visual scan. Walk every room slowly. Look for discoloration at baseboards, swollen panel edges near walls, and any staining around plumbing penetrations.
- Smell test. Get close to the floor near toilets, under sinks, and at exterior thresholds. A musty odor at floor level is a strong indicator of trapped moisture.
- Tap test. For tile floors, use a coin or knuckle to tap individual tiles. A solid tile sounds dense. A hollow sound means the tile has lost its bond to the mortar, which points to subfloor movement below.
- Screwdriver probe. At any soft or discolored spot, press a flathead screwdriver firmly into the subfloor through a seam or at a baseboard edge. Sound wood resists the tip; water-damaged wood crumbles or lets the tool sink with little resistance.
- Moisture meter readings. If you own or can borrow a pin-type moisture meter, take readings at panel edges, seams, and the center of each panel. Read the edges first — OSB wicks water along its edges before the center shows damage.
- Crawlspace check. If accessible, look up at the subfloor from below with a flashlight. Staining, soft spots visible from underneath, or active dripping are definitive.
Safety first: Never enter a space with standing water near electrical outlets or panels. If the water source was a sewage backup or toilet overflow, treat it as contaminated and don’t handle it without gloves and respiratory protection.
Pro Tip: Homeowners often blame floor slope and squeaks on normal settling. The screwdriver probe is the fastest way to tell the difference — it costs nothing and takes 30 seconds.
4. Repair or replace? How to decide
| Condition | Likely Decision | Key Indicator |
|---|---|---|
| Localized soft spot, stiffness mostly intact | Repair possible | Screwdriver meets resistance at edges |
| Moisture reading — | Monitor or dry first | Meter reading at panel edges |
| Moisture reading above significant levels | Replacement likely | Multiple panels affected |
| Screwdriver sinks easily, OSB crumbles | Replace | Structural rigidity lost |
| Joist damage visible or suspected | Replace + sister joists | Fasteners pulling through |
| Widespread delamination or mold | Replace + remediation | Mold visible, odor persists |
The core question is whether the subfloor still has structural rigidity. A localized soft spot with firm edges around it can sometimes be cut out and patched. But once OSB delamination spreads along panel edges and joints, the damage is almost always more extensive than the surface suggests. Tile floors add cost: backer board and tile must come up before the subfloor is even accessible.
If joists are compromised, a panel swap alone won’t fix it. Sistering damaged joists or using epoxy repair adds time and cost, and it’s a structural issue that requires a contractor, not a DIY patch.
5. What a restoration contractor actually does
Professional remediation follows a defined sequence, and speed at each stage directly affects total cost.
- Emergency mitigation. Stop the water source, extract standing water using truck-mounted or portable extraction equipment.
- Moisture mapping. Contractors use pin meters, non-invasive sensors, and thermal imaging to map exactly where moisture has traveled — including inside walls and under cabinets.
- Drying and dehumidification. Commercial desiccant or refrigerant dehumidifiers run continuously, typically for 3–5 days, until readings reach target drying goals.
- Mold containment and remediation. If mold is present, containment barriers go up before any demolition. Mold remediation follows IICRC S520 protocols.
- Subfloor repair or replacement. Damaged panels are removed, joists are assessed, and new panels are installed and fastened to spec.
- Final restoration. Flooring, baseboards, and any affected cabinetry are reinstalled. A final moisture check confirms the structure is dry before close-up.
Prolonged saturation accelerates every cost driver. A subfloor wet for 24 hours may dry with fans. The same subfloor wet for two weeks likely needs full replacement, mold remediation, and possibly joist repair. The water damage assessment process matters as much as the repair itself.
6. Will insurance cover subfloor replacement?
Usually, yes — if the cause was sudden and accidental. A burst pipe, a washing machine hose failure, or an appliance malfunction that you didn’t know about typically qualifies. Gradual damage from a slow leak you ignored for months typically does not.
Documentation checklist:
- Photos and video with timestamps taken before any cleanup begins
- Moisture meter readings documented by date
- Written estimates from at least one licensed contractor
- Receipts for any emergency mitigation (fans, dehumidifiers, extraction services)
- A professional inspection report identifying the source and extent of damage
Your policy likely requires you to mitigate further damage even while the claim is processing. That means stopping the leak, extracting water, and beginning drying — not waiting for an adjuster to arrive. Save every receipt. Insurers expect reasonable mitigation, and failing to act can reduce or void a claim. For Illinois-specific claim steps, the insurance claim process varies by carrier and policy type.
Pro Tip: Document the water source clearly in your photos — show the failed supply line, the cracked wax ring, or the appliance connection. Ambiguous cause is the most common reason adjusters push back on subfloor claims.
7. How to keep your subfloor dry going forward
Prevention is mostly about catching small failures before they become expensive ones.
- Inspect washing machine, dishwasher, and refrigerator supply hoses annually. Replace rubber hoses with braided stainless steel versions.
- Press on the floor beside every toilet base twice a year. Any give means the wax ring needs replacement.
- Check caulking around tubs, showers, and sink bases each spring. Recaulk any gaps immediately.
- Keep gutters clear and confirm that exterior grades slope away from the foundation. Water pooling at thresholds finds its way in.
- Install a vapor barrier in any unconditioned crawlspace and maintain crawlspace ventilation or convert to a conditioned crawlspace if humidity is a recurring problem.
- Add leak-detection alarms under sinks and behind appliances. Automatic shutoff valves on washing machine supply lines are inexpensive and stop a hose failure before it saturates the floor.
- Run a dehumidifier in damp basements, especially through Chicagoland’s humid summers.
For a broader look at protecting your home from water damage, routine checks are far cheaper than emergency repairs.
8. Red flags that mean you need a pro right now
Some situations are beyond DIY mitigation. Call a licensed restoration contractor immediately if you see any of these:
- The floor sags visibly or feels structurally unsafe to walk on.
- The screwdriver sinks into the subfloor with no resistance.
- Fasteners are pulling through the panel surface.
- Visible mold growth anywhere near the affected area.
- A musty odor persists after you’ve dried the surface and removed standing water.
- The water source was a sewage backup or toilet overflow.
- Saturation covers a large area or has been present for more than 24–48 hours.
When you call, ask these questions: Are you IICRC-certified? What moisture-mapping method do you use? What are your target drying goals and how do you document them? Do you handle insurance claims directly? Can you provide references from similar jobs?
A contractor who can’t answer those questions clearly isn’t the right call.
Key Takeaways
Subfloor water damage progresses fast: a floor that’s soft in one spot today can lose structural rigidity across multiple panels within days if the moisture source isn’t stopped and drying doesn’t begin immediately.
| Point | Details |
|---|---|
| Stop the source first | No drying plan works while water is still entering the subfloor. |
| Moisture thresholds matter | Moisture readings above 20% are significant; readings above 25% commonly mean replacement should be considered. |
| Probe before you assume | The screwdriver test distinguishes rot from settling in 30 seconds — crumbling fibers mean structural loss. |
| Speed cuts cost | Prolonged saturation turns a patchable panel into a full replacement with joist repair. |
| Zerowaterrestoration | Provides 24/7 emergency response, moisture mapping, mold remediation, and insurance coordination across the northwest Chicago suburbs. |
What Chicagoland homes keep teaching us about subfloor damage
The freeze-thaw cycle in the northwest suburbs does things to plumbing that warmer climates don’t see. Supply lines that hold fine through a mild winter crack in February, and by the time a homeowner notices the floor is soft, the subfloor has been wet for weeks. Crawlspace humidity is the other persistent problem — homes built in the 1970s and 1980s throughout Schaumburg, Palatine, and Arlington Heights often have no vapor barrier at all, and the subfloor absorbs ambient moisture year-round without any single dramatic event to trigger a claim.
What I find consistently underestimated is how far OSB damage travels from the visible wet spot. Homeowners see a soft area near the toilet and assume it’s contained. The moisture has usually wicked along panel edges and seams well beyond what’s visible from above. That’s why moisture mapping matters more than a visual inspection alone.
The other thing worth saying plainly: drying the surface without confirming the source is fixed accomplishes nothing. The odor comes back. The mold comes back. The floor stays soft. Contractors who use documented drying goals and verify with post-drying moisture readings are the ones worth hiring.
Zerowaterrestoration: fast help when your subfloor can’t wait
When a subfloor is wet, the clock is already running. Zerowaterrestoration handles the full scope of water damage work for homeowners throughout the northwest Chicago suburbs — from the first call through final reconstruction.
Services include 24/7 emergency water extraction, commercial drying and dehumidification, moisture mapping, mold remediation, subfloor replacement, and complete water damage restoration from start to finish. The team also works directly with your insurance provider, managing documentation and adjuster communication so you’re not doing that on top of everything else.
Zerowaterrestoration serves Schaumburg, Arlington Heights, Palatine, Barrington, Lake Zurich, Streamwood, and surrounding communities. For a free inspection and estimate, call (847) 515-7000 or visit zerowaterrestoration.com.
Useful sources and further reading
- IICRC Standards — Industry standards for water damage restoration and mold remediation (S500, S520)
- EPA Mold Guidance — Federal guidance on mold health risks and remediation basics
- FEMA Flood Resources — Flood maps and response resources for homeowners
- Angi: Signs of water damage under the floor — Practical homeowner overview of physical signs
- Bob Vila: Signs of water damage under floors — Tile-specific and general inspection guidance
- Total Dry Restoration: Water damaged subfloor guide — Repair vs. replace criteria and cost context
- Zerowaterrestoration.com — Local emergency response, assessment, and restoration for the Chicagoland area