
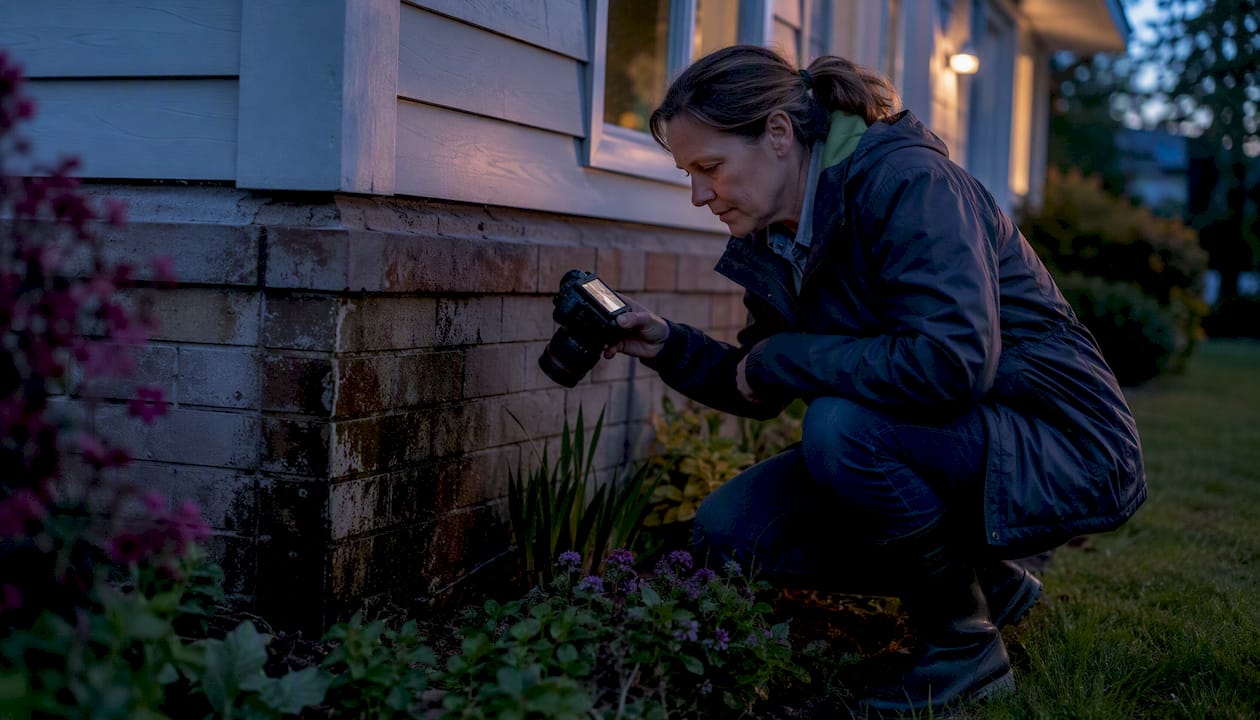
Building envelope water intrusion is the unwanted entry of liquid water, water vapor, or moisture through a building’s roof, walls, windows, doors, or foundation into the conditioned interior. If you’re seeing stains, smelling mustiness, or finding damp spots after rain, your first move is to document everything with photos, stop any active water source if it’s safe to do so, and call a qualified restoration specialist for an assessment. This is distinct from a plumbing leak: envelope intrusion involves the building enclosure itself and requires enclosure-focused diagnostics. Industry standards like ASTM E241 and EPA moisture-control guidance both treat moisture management as a design, construction, and maintenance responsibility, not just a repair problem.
- The building envelope includes: roof assemblies, exterior walls and cladding, windows and doors (fenestration), and below-grade foundation walls.
- Intrusion can be liquid water during rain events, capillary absorption through porous materials, condensation within wall cavities, or groundwater seepage.
- Envelope intrusion is not the same as a burst pipe: the source is outside the conditioned space, and the fix requires sealing the enclosure, not just drying the interior.
Pro Tip: Take timestamped photos of every wet spot, stain, or mold patch before touching anything. That documentation becomes critical for your insurance claim.
Table of Contents
- How do you recognize building-envelope water intrusion?
- What causes the building envelope to fail and let water in?
- What does water intrusion actually do to your building?
- How professionals diagnose building-envelope water intrusion
- Prevention and maintenance: how to reduce intrusion risk
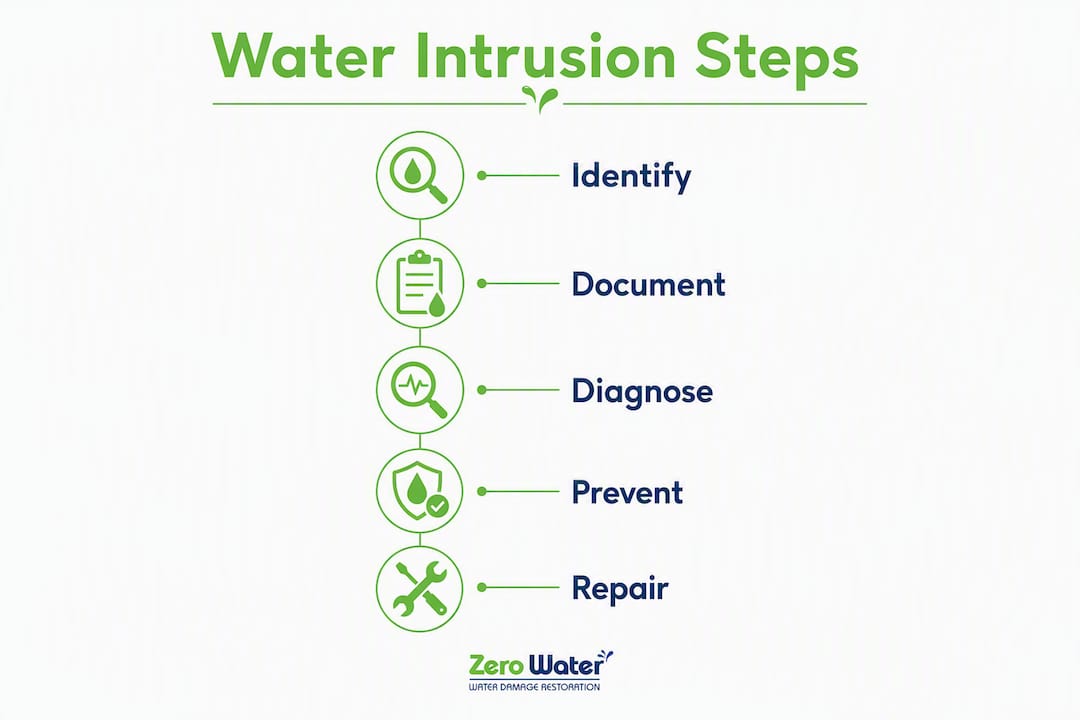
- What to do immediately after discovering water intrusion
- What professional remediation involves, and what it costs
- How Zerowaterrestoration handles building-envelope water intrusion
- Key Takeaways
- Why quick action matters more than most homeowners realize
- Zerowaterrestoration is ready when you need emergency help
- Authoritative sources and standards
How do you recognize building-envelope water intrusion?
Visible warning signs of envelope moisture problems often appear far from the actual breach. Water follows gravity, capillary pathways, and pressure differentials, so a stain on a second-floor ceiling may trace back to a failed roof-to-wall flashing two stories up.
Common indicators, per Chubb’s water intrusion guidance:
- Interior staining or water lines on ceilings and walls
- Efflorescence (white mineral deposits) on masonry or foundation walls
- Visible mold or mildew, especially near window frames or at wall-to-floor transitions
- Peeling paint or bubbling plaster on exterior-facing walls
- Persistent musty odors in conditioned spaces, even when no visible moisture is present
- Unexplained humidity spikes in rooms that should be dry
- Water appearing at window or door frames, roof-to-wall transitions, or around pipe penetrations during or after rain
The key behavioral clue: if wet spots appear or worsen specifically after rain events, the source is almost certainly the building enclosure, not plumbing.
Pro Tip: Check the same spots after two or three separate rain events. A pattern that repeats confirms envelope intrusion and helps a professional pinpoint the entry path faster.
What causes the building envelope to fail and let water in?
Most envelope failures trace back to a handful of root causes, and understanding them helps you prioritize repairs rather than just patch the surface.
- Installation deficiencies: Improper flashing at roof-to-wall transitions is a primary contributor to many intrusion cases. A missing kickout flashing or a reversed lap in the weather-resistive barrier (WRB) can funnel water directly into the wall cavity.
- Material deterioration: Roofing membranes dry out and crack with age; sealants around windows and penetrations lose adhesion after years of UV exposure and freeze-thaw cycling.
- Storm and impact damage: Wind-driven rain, hail, and debris breaches in cladding or roofing create immediate entry points.
- Deferred maintenance: Clogged gutters, blocked roof drains, and debris accumulation force water to back up beneath roofing or wall materials.
- Site drainage failures: Poor grading that slopes toward the foundation, missing downspout extensions, and inadequate drainage at below-grade walls all create hydrostatic pressure that pushes water through foundation walls.
A single transition failure — one missing kickout flashing, one improperly lapped WRB seam — can defeat an entire wall assembly that was otherwise correctly installed. Integrated component performance is what determines success, not any single material.
Stucco and EIFS claddings deserve special mention. Because they can act as reservoir claddings that absorb and hold moisture, they often mask extensive hidden damage until the framing or sheathing behind them is already compromised.
What does water intrusion actually do to your building?
The technical term is hygrothermal damage: the combined effect of moisture and temperature cycling on building materials over time. ASTM E241 documents the range of moisture-induced degradation types and recommends addressing moisture control through design, construction, and maintenance decisions.
The material consequences compound quickly:
- Wood rot and framing decay: Sustained moisture above roughly 19% wood moisture content activates wood-decay fungi, weakening structural members.
- Masonry spalling: Freeze-thaw cycling in saturated brick or concrete causes surface layers to fracture and break away.
- Corrosion of metal fasteners: Wet wall cavities corrode steel screws and connectors, reducing their load capacity over time.
- Loss of insulation performance: Wet insulation loses most of its R-value, driving up energy costs alongside structural repair costs.
- Mold growth: MDPI research confirms that hygrothermal damage compromises building materials and may necessitate remediation to ensure both safety and durability.
“Moisture intrusion is a long-standing problem that building owners and managers face daily. Regardless of the means of moisture intrusion, the results can be very serious not only to building materials but also to occupant comfort and health due to microbiological growth on environmental surfaces and within building cavities.”
— ASCE Library, Mold Damage Due to Moisture Intrusion
Electrical hazards are another real risk: water reaching junction boxes, outlets, or panel components creates shock and fire exposure that demands immediate power isolation.
How professionals diagnose building-envelope water intrusion
Professionals use a framework called the leak triangle: every intrusion event has a source (where water originates), a path (how it travels through the assembly), and a pressure (the driving force, whether wind, gravity, or capillary action). Removing any one leg stops the intrusion. That framework guides every diagnostic step.
Diagnostic tools and methods:
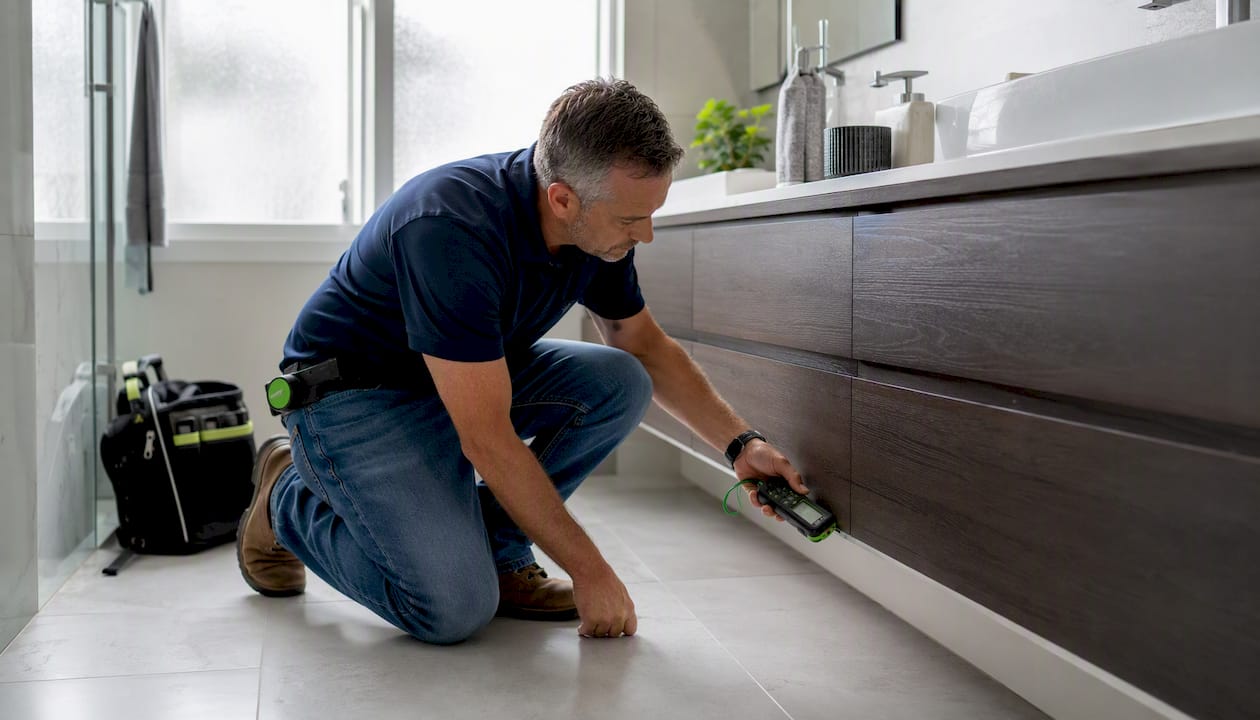
- Pin and pinless moisture meters: Map moisture levels within wall and ceiling assemblies without opening them.
- Infrared thermography: Reveals temperature differences caused by evaporative cooling from wet materials, showing hidden wet zones as cooler areas on a thermal scan.
- Relative humidity probes: Measure vapor conditions inside wall cavities to distinguish condensation from active liquid intrusion.
- ASTM E1105 spray-rack testing: Applies controlled water to specific exterior sections to replicate rain exposure and confirm exactly where water penetrates.
- Exploratory openings: When non-destructive tools point to a zone but can’t confirm the failure mechanism, removing cladding or interior finishes reveals the actual defect.
| Diagnostic Method | What It Detects | When It’s Used |
|---|---|---|
| Pin/pinless moisture meter | Elevated moisture in assemblies | First-pass mapping, non-destructive |
| Infrared thermography | Hidden wet zones via temperature differential | After rain or during active drying |
| RH probes | Vapor accumulation in cavities | Condensation vs. liquid intrusion |
| ASTM E1105 spray test | Confirmed water entry at fenestration or wall | When source is unconfirmed |
| Exploratory openings | Actual failure mechanism (flashing, WRB) | After non-destructive tools narrow the zone |
Pro Tip: Before any invasive work, photograph moisture meter readings across multiple rooms and floors. That spatial map tells a professional where water is traveling, not just where it arrived.
Prevention and maintenance: how to reduce intrusion risk
EPA moisture-control guidance puts site-level controls first: slope grade away from the building, divert stormwater, and prevent groundwater from contacting the foundation. Those basics are often overlooked but they’re the first line of defense.
Site and envelope best practices:
- Maintain a slope grade away from the foundation to divert water and prevent pooling near the building.
- Keep gutters clear and ensure downspouts divert water effectively away from the foundation.
- Regularly inspect and replace sealants at window and door perimeters to maintain water tightness.
- Verify flashing integration at roof-to-wall transitions and above every window and door opening annually.
- Prefer drained wall assemblies with a clear drainage plane over face-sealed systems; drained systems tolerate minor installation gaps far better.
Maintenance schedule:
- Quarterly: Visual check of gutters, downspouts, and visible cladding for cracks or gaps.
- Annually (spring): Professional roof and flashing inspection after winter freeze-thaw cycles.
- Every 5–7 years: Sealant replacement at all penetrations, windows, and doors.
- After major storms: Immediate exterior check for cladding breaches, displaced flashing, or debris on roof drains.
- Multi-family or complex properties: Consider a building-enclosure consultant for a formal envelope commissioning review.
For more water damage prevention steps, a structured checklist helps you stay ahead of the most common failure points.
What to do immediately after discovering water intrusion
Speed matters. Mold can begin colonizing wet materials within 24–48 hours of saturation.
- Stop the water source if it’s safe: close a roof hatch, redirect a downspout, or tarp a breached roof section.
- Isolate power in any area where water is near outlets, panels, or junction boxes. Electrical hazards from water intrusion are serious and often underestimated.
- Move valuables and contents out of wet areas to prevent secondary damage.
- Document everything: photos and video of every stain, wet spot, and affected material, with timestamps. Note the date, time, and weather conditions.
- Apply temporary mitigation: plastic sheeting over roof breaches, towels and buckets for active drips, and fans to begin air circulation.
- Notify your insurer promptly, but do not wait for an adjuster before starting emergency mitigation. Keep all receipts for emergency materials and services.
- Call a restoration professional for a moisture assessment before any demolition or repair.
Pro Tip: Your insurance claim steps depend heavily on documentation. The more timestamped photos you have before cleanup begins, the stronger your claim.
What professional remediation involves, and what it costs
Professional restoration follows a defined sequence, and the timeline varies significantly based on how far the moisture has traveled.
Service phases:
- Emergency response and water extraction (same day)
- Drying and dehumidification with moisture monitoring (typically 2–7 days)
- Mold assessment and mold remediation if required (days to weeks depending on extent)
- Repairs and reconstruction (days to months for major structural work)
Cost drivers:
- Accessibility of the intrusion source (roof vs. below-grade vs. wall cavity)
- Extent of hidden damage discovered during exploratory openings
- Presence of mold contamination requiring containment and remediation protocols
- Need for demolition and structural rebuild
- Local labor and material prices
A professional scope should include moisture mapping with documented drying targets, written reporting for your insurer, and direct coordination with your adjuster. The restoration process for Illinois homeowners involves specific documentation requirements that experienced contractors handle as part of the job.
Questions to ask any contractor before signing:
- Are you licensed and insured in Illinois?
- Do you carry IICRC certification for water damage restoration?
- What is your guaranteed response time for emergencies?
- Will you communicate directly with my insurance adjuster?
- Can you provide a written moisture-mapping report?
How Zerowaterrestoration handles building-envelope water intrusion
Zerowaterrestoration has been serving homeowners and property managers across the northwest Chicagoland suburbs for over 10 years. The team is available 24/7 for emergency response, covering Schaumburg, Arlington Heights, Palatine, Hoffman Estates, Barrington, Lake Zurich, Streamwood, and surrounding communities.
What Zerowaterrestoration provides:
- Immediate water extraction and containment on the same day you call
- Moisture mapping and documented drying protocols that meet insurance reporting standards
- Coordination with building-envelope consultants for controlled water testing when the intrusion source is unconfirmed
- Full mold remediation services when moisture has been present long enough to support growth
- Complete reconstruction from framing to finishes, so you’re not managing multiple contractors
- Direct communication with your insurance adjuster throughout the claim process
When you call, have your insurance policy number ready, a brief description of where and when you first noticed the problem, and any photos you’ve already taken. That information gets the team oriented before they arrive.
Key Takeaways
Building envelope water intrusion requires enclosure-focused diagnostics and professional remediation, not just surface patching, because moisture travels far from its entry point and causes compounding structural and health damage.
| Point | Details |
|---|---|
| Definition matters | Envelope intrusion enters through roof, walls, windows, or foundation — not plumbing — and needs enclosure-focused repair. |
| Three urgent warning signs | Recurring wet spots after rain, efflorescence on masonry, and musty odors in conditioned spaces all demand professional assessment. |
| Document before you touch anything | Timestamped photos of every affected area protect your insurance claim and guide professional diagnostics. |
| Prevention starts outside | Grading, gutters, and flashing inspection are the highest-return maintenance habits for reducing intrusion risk. |
| Zerowaterrestoration | Offers 24/7 emergency response, moisture mapping, mold remediation, and insurance claim coordination across the northwest Chicago suburbs. |
Why quick action matters more than most homeowners realize
The conventional wisdom is that water damage is primarily a materials problem: dry it out, replace what rotted, move on. That framing misses the real risk. The most expensive envelope intrusion cases I’ve seen aren’t the ones where the roof blew off in a storm. They’re the ones where a single failed kickout flashing let water into a wall cavity for two or three years before anyone noticed a stain. By then, the framing is compromised, the sheathing is saturated, and what could have been a $2,000 flashing repair becomes a $30,000 wall reconstruction.
The other thing people underestimate is the mold timeline. Forty-eight hours is not a comfortable window. In a humid Midwest summer, that window closes faster. Getting a professional on-site the same day you discover intrusion is not overcautious; it’s the decision that keeps a manageable problem from becoming a structural one.
Zerowaterrestoration is ready when you need emergency help
When envelope intrusion has already happened, the priority is stopping further damage and getting a professional moisture assessment before any repair work begins. Zerowaterrestoration responds same-day across the northwest Chicago suburbs, handles the full scope from extraction through reconstruction, and works directly with your insurance provider so you’re not managing the claim alone.
For water damage restoration in Barrington, Lake Zurich, Schaumburg, and surrounding northwest suburbs, call (847) 515-7000 any time, day or night. A free inspection and estimate is available for all new calls. If mold is a concern, the dedicated mold remediation page outlines exactly what that process involves and what to expect.
Authoritative sources and standards
“The most common construction defect claims are moisture-related problems associated with the building enclosure.”
— IIBEC Interface, Moisture-Related Problems: Identifying the Contributing Factors
- ASTM E241 — Standard Guide for Limiting Water-Induced Damage to Buildings: The primary industry standard for moisture-induced damage types and prevention through design and maintenance.
- EPA Moisture Control Guidance for Building Design, Construction and Maintenance: Practical federal guidance on drainage, capillary breaks, and assembly design.
- MDPI — Water Intrusion: An Analysis of Water Sources, Categories, and the Degradation Science of Building Materials: Peer-reviewed research on hygrothermal damage mechanisms and material degradation.
- IIBEC Interface — Moisture-Related Problems: Identifying the Contributing Factors: Technical forensic guidance on the leak triangle (source, path, pressure) framework.
- Forensic Engineering News — Water Intrusion Damage: Forensic Investigation of the Building Envelope: Practical overview of ASTM E1105 testing, moisture meters, and exploratory openings.
- USANOVA — What Is Water Intrusion in Buildings: Building-enclosure consulting perspective on envelope vs. plumbing intrusion and integrated component performance.
- Envista Forensics — When Building Envelopes Fail: Forensic investigation methodology for identifying water entry points in roof and wall systems.
- ASCE Library — Mold Damage Due to Moisture Intrusion: Academic reference on moisture intrusion pathways and health consequences of microbiological growth.
This article is general information, not professional engineering or legal advice. Confirm current standards and requirements with a licensed building professional or your local authority for your specific situation.